Saturday 25 December 2021

Coil Steel Cars

 A trio of coil steel cars have come into view along the GTW line. These three cars all belong to and have been weathered for Jamie Barron.

This GTW car looks to have been out in the weather for several years.

CNW looking a little faded, with a bit of rust streaking also. (I've fixed that support on the left hand side since I took the photo.  I hadn't even noticed that slight bit of damage until I posted the photo here)

The gondola portion has picked up some general grime, but the covers of this UP car now appear pretty well faded and worn.

I don't really know how the inside of these type of cars appear, but I decided I ought to do a bit of  weathering in there too. They'll look better if Jamie should feel like occasionally running the cars with the hoods removed.
Looking down on the hoods and interior of the GT car


Inside the CNW car

And the interior of the Union Pacific coil car

It's Christmas morning, so I'll close this out by wishing every one of you and your families and friends all a very Merry Christmas
Click the link below:

Saturday 18 December 2021

Aluminum Pile at the Metal Recycler Site

 After having some success a couple of weeks ago upgrading the area of the scrap steel pile at the recycler site, I thought I'd best get busy and follow up with similar work around the non-ferrous metal pile as well. Below is a couple of "before" looks at the aluminum pile and the surrounding area.

The pile does kind of look like it was just dropped into place (which is true really) and not very realistic looking


A drone-style "before" view of the non-ferrous pile

I had a small bag of the tiny bits of aluminum that Brian had given me, so I spread some of that somewhat randomly around the base of the pile
I removed the fencing around the site, as it is paper adhered to styrene. Moisture from the diluted glue I was about to use could "wick" up the paper and stain or discolour it. The fence can be seen laying in the background of the photo.

Here's the view of my non-ferrous metal pile after the additional material has been added and the fencing is back in place.  The GT road switcher could be along almost any time now as it looks like the TTX RailGon that appears in the first couple of photos is loaded now as well.

Saturday 11 December 2021

Caustic Soda Tank Car

 Friend Luc asked recently if I would be interested in weathering this Atlas model Caustic Soda tank car for him, and sent me photos to use as examples of how much weathering he wanted on the car.  I'm not crazy about having to do weathering on white cars, but this one kind of caught my interest, so...

Below is the prototype photo that I was sent:

Sorry, I don't know who took the photo, but credit to that person. I looked for it on rrpicturearchives.net , but it wasn't on that site.

And so here's the model...

The "before" photo


I mixed Craftsmart brand acrylic paints "Espresso" and "Light Yellow" and thinned the mixture with ordinary tap water.  Yes, the colour change is subtle, but it's way easier to add more colour later if necessary than it is to take it off.

Showing a bit of wear on the area around the top hatch.  This was done with a little flat black sprayed in that area of the car, and then a little bit of burnt sienna and burnt umber artist oil colours is stippled on top of that.

This view shows the other side of the tank car.  The rust blisters and accompanying streaks are also done using the burnt sienna and burnt umber.

The model had the reflective stripes painted on at the factory.  I put Smokebox Graphics stripes over top of the originals, but (oddly) they are just about 1/32" shorter than those painted-on ones.

Here's a really short YouTube video from Boomer Dioramas.  The CN engine looks great, but it's the industrial building that really caught my eye.

Saturday 4 December 2021

The Ground at the Scrap Metal Recycler

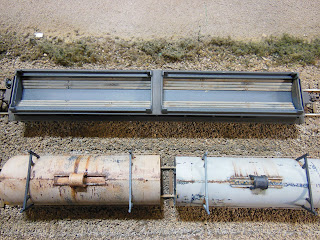
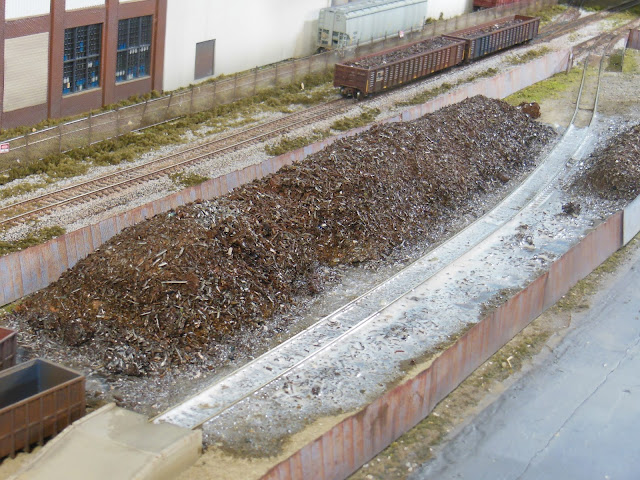
3 weeks ago, I posted this same picture (below) featuring my pair of GTW GP38-2's switching at MidWest Plastics.  What was interesting to me though was that 2 readers, Ken and DandH, left comments focusing on the metal recycler industry in the foreground.

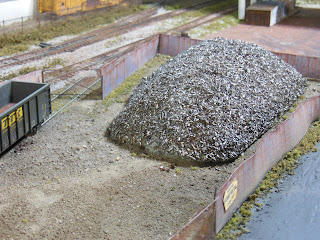
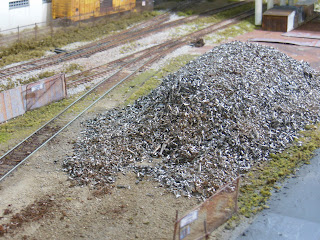
Both felt that the ground surrounding the pile was too neat and square. Well, in all honesty, they weren't wrong.  Note how "squared off" the scrap pile appears. 


I searched for and found a small plastic bag that I had with just a little bit more of the metal chips that I could scatter about this industry to try to make the place a little less tidy.

I sprinkled the little bit that I had all along the base of the pile to sort of soften the piles' edges, and all along both sides of the track.  I then added the rest of the material in between the rails as well.

Since the material is actual ferrous metal, and the electric motors in our model engines have magnets, I though I'd better make darn sure the metal was glued down well.  Really well.  Which brings us to this next photo...
All of that white area in the photo above is diluted white glue covering the metal chips that I had spread around. I first sprayed the area with diluted isopropyl alcohol so that the diluted glue would flow easily among the metal shavings. I know, it looks brutal at this stage.  I was a little concerned that maybe I overdid things a bit with the white glue, but I don't really think it will be a problem.

The glue is almost completely dry after sitting overnight, and we can see where the metal has been spread all along the ground.

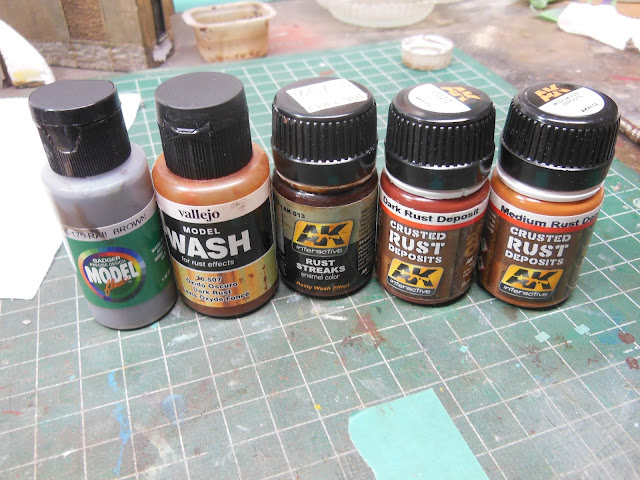
My next step was to brush and airbrush a variety of rust colours along the track.  I wanted to try to give the appearance that rust had run off the metal onto the ground.  Here's the rust colours that I used.

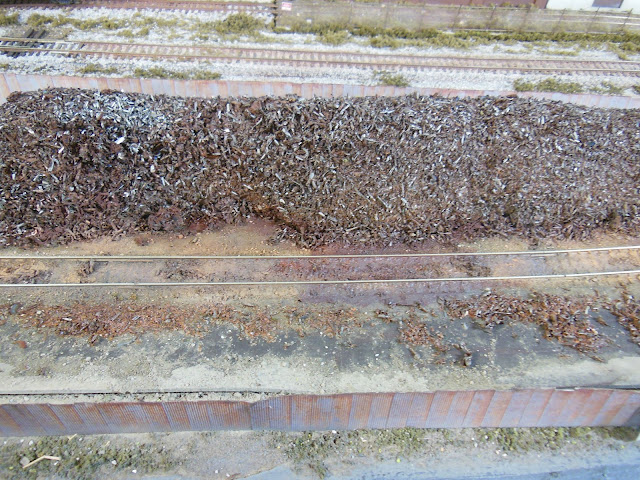
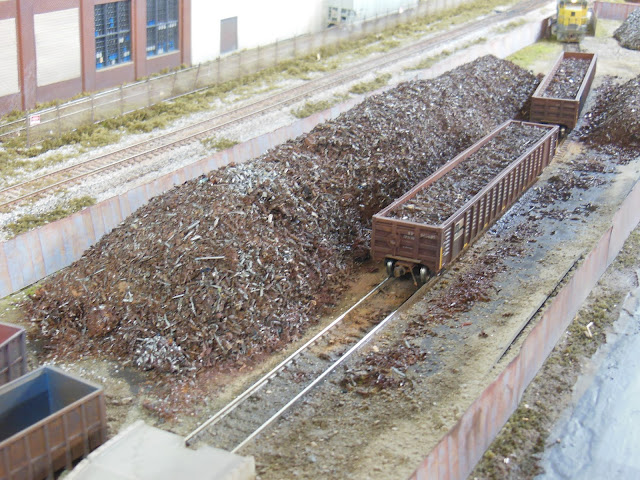
Here's a closer look at the the ground  and track within the recycler yard.

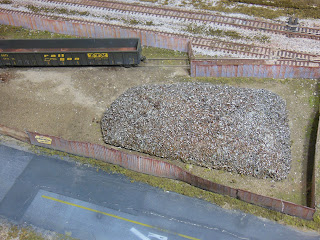
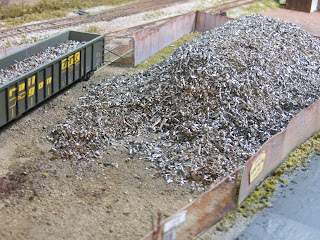
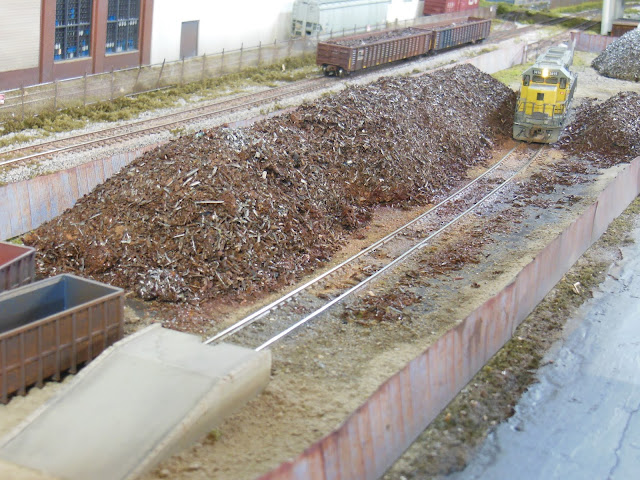
So, with everything dried and the rails cleaned off, it was time to test the spur track to see if I had created any electrical issues, as well as check if any of the metal scraps were impeding locomotives or freight cars as they make their way along the spur.

SD40 3415 happened to be handy, so here it comes to check the spur for any operating trouble.

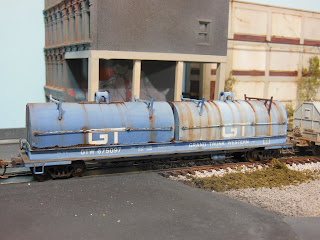
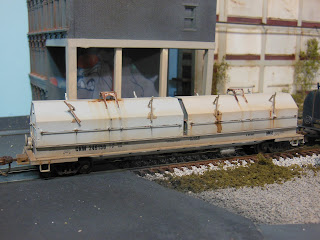
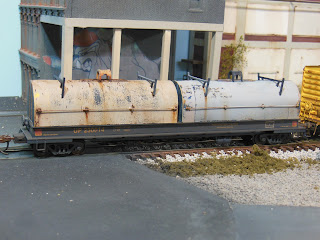
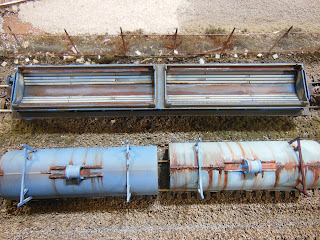
All was good when 3415 ran in and out of the spur a few times, so two gondolas have been spotted into the industry and been loaded.
I think the area has a higher realism to it now.  So thanks to Ken, DandH, and to Brian too for giving me those metal chips in the first place.

Saturday 27 November 2021

Switching along South Industrial Blvd.

Here are a few views featuring a leaser locomotive from Larry's Truck and Electric switching one of the JSSX clients along South Industrial Blvd.  Six axle locomotives have started to become a bit more rare on the JSSX recently as a couple of them have been sold off.  This one's a keeper though...

To have such a large area of the locomotive painted out in flat black like this is a real eye-catcher (well, it is for me anyway). Sean Steele painted and patched this locomotive for me some years ago after I had seen photos of the prototype on-line.

The "snoot nose" front end hood is 116" in length, which helps distinguish this SD40-2 as well.  My understanding is that the UP ordered that extra length to house radio equipment with the intention that these locomotives be used in mid-train helper service.

A drone view of 3415 shoving a SOO Line boxcar to the loading dock.  Going by the condition of the windows, those upper floors of the structure look to be unused or abandoned space. We saw that CSX car last week as it was spotted along here as well.

The view from street level.  This is one of my favourite railfanning locations. That boxcar looks like it's showing some age.

The No Excess Height Cars warnings on the building are a little out of focus in this photo. At least the boxcar is in focus. On the end of the boxcar, we can see the glow from the engine's headlight.

End view of that Soo car as it's being shoved into place

Looks like the car has reached destination.

Saturday 20 November 2021

Rationalization Continues

As I have continued to sell off  a few models that don't see much running time out on the layout, I offered up for sale this Kato SD38-2 leaser model.  A former Chicago and NorthWestern  locomotive, I had patched and re-lettered this one for National Railway Equipment (NREX). It really didn't take too long for this model to find a new layout, where hopefully it will see lots of running time.

6656 out on it's last run around the layout

This Kato SD40-2 is another leaser-type locomotive that has found a new layout.
 Both of the above locomotives have made their way to another modeler in Kingston, Ontario.

Also this week, I was rotating a few freight cars off of the layout, and cycling some others on. One that hadn't been on for some time is this heavily weathered waffle sided boxcar. At 7315 cu.ft., these cars are pretty big.

This particular boxcar started out all blue before it acquired all that surface grime and rust.  It's been a long time since I weathered this one, but I did emulate a prototype that I had a picture of at the time.

I was shoving the Pullman-Standard 60 footer to the loading dock, when I noticed some slight damage, so I took it over to the workbench for some quick repair.  The car is pictured again below, with it's two damaged stirrup steps repaired and FRA reflective stickers attached.  The stirrups were bent almost to the point of breaking off completely.  They're just such a fine detail that it's almost seems like they can be damaged if you just look at them.
I took a little time on-line to research the sticker locations.  I didn't find prototype photos of this exact number car, but I did find one that was close, so I tried to at least emulate that. There are differences in the placement of some of the labelling/marking between the prototype and this Exactrail model. A bit of compromise had to be made so as to not cover over any of those printed markings.

And another faded and weathered 7315 cu.ft. waffle boxcar had the reflective stripes added at the same time. This one is lettered for the Norfolk Western.
I have two or three other similar cars that will receive the stripes as they work their way onto the layout.

Saturday 13 November 2021

Around the Layout

 Just showing a few views from around the layout...

A pair of covered hoppers waiting to be loaded at the transload located at the far end of the JSSX yard.

And the JSSX maintenance building at the near end of the yard.

GP 38-2's 6210 with 6212 are framed by the highway overpass as they enter into the GTW's industrial switching area.

6210 & 6212 dropping covered hoppers into MidWest Plastics

Seeing some rare time out and about on the layout is GTW 6416 re-numbered, but still in the original orange paint of the DT&I.

Oops...Looks like that drop step needs some repair.  Something to keep the shop forces busy I guess. Once that's repaired, this engine could be a good candidate for "rationalization".

Saturday 6 November 2021

Rationalizing Equipment

I'd imagine that pretty well all of us have model railroad "equipment" which, to put it simply, we just don't use. I've got maybe half a dozen or so engines that I can't remember the last time they ever "turned a wheel" on the layout. Not that I don't like them, I just don't use them. So how much sense does it really make to keep them?

This Detroit, Toledo and Ironton GP 38 #204 is one such model. I've had this one for several years.  The justification I used for buying it several years ago, was that my JSSX shortline interchanges with the GTW. And of course GTW had acquired the DT&I and it's equipment in the early 1980's, so this engine should fit in quite nicely out on the layout. Right? At least that was my rationalization at the time.

The 204 runs very well using it's original Atlas dual-mode decoder set, to DCC control. Note the unique design of those spark arrestors on the hood.

All that, plus the DT&I orange with the large black lettering looks really sharp. And that "We've got the Connections" compass on the sides of the cab is pretty cool too.

The upshot of all this is that I put my 204 up for sale on-line, and less than a day later someone agreed to my asking price.  So, this GP38 is now on it's way to a new home where hopefully it's made use of and enjoyed.
A final view of my DT&I 204

Saturday 30 October 2021

Transloader Conveyor

 Friend Luc gifted me this 3-D printed hopper loading conveyor model a month or two ago. It should fit in nicely over at the transload site.

The model is printed in only two pieces, shown here on the work bench before painting and assembly.  This is the first 3-D printed model I've ever had.  I was a little surprised by the amount of material that had to be trimmed away.  Sure was easy to file smooth though.

That's the two pieces of the conveyor on the right.  All the other stuff in the picture is the support material that has been trimmed away.  Seems like as much material is lost as there is in the model.

Luc had also sent me this photo below of a somewhat similar conveyor...

This prototype conveyor has a walkway and railing, and looks like it has a drive motor as well. Perhaps there's a motor available somewhere that would go with the conveyor model.  For now though, I'll just do without.

The two pieces of the model are simply press-fitted together, which makes the height somewhat adjustable. Here is the assembled model, painted white similar to the one in the prototype photo.

The tires are painted Carbon Black, and a dab of silver is used for the wheel hubs, drive shaft ends, and on the discharge chute.

I shortened the chute about 1/8" so that it would clear the tops of covered hoppers. That means however that the conveyor will be oriented in the opposite direction to the one in the proto photo above, where the feeder end goes beneath the rail car and the discharge end would go to a dry bulk trailer.  I still don't have such a trailer.
Just a touch of brown Tamiya Panel Line colour here and there to add some light weathering. Also, a light touch of Tamiya black Panel Line to highlight the screen at the feeder end of the conveyor.

Below are a couple of views of the conveyor in place at the transload...


And one more thing... if you've got a few minutes, have a look at this video (link below) which was posted to YouTube last Saturday.  It shows the very nice Seaboard Central layout's last day and final run. The owner - sorry, I don't know his name - is dismantling the layout, with plans to rebuild.