Friday 24 June 2022

Yup, Another Mill Gondola

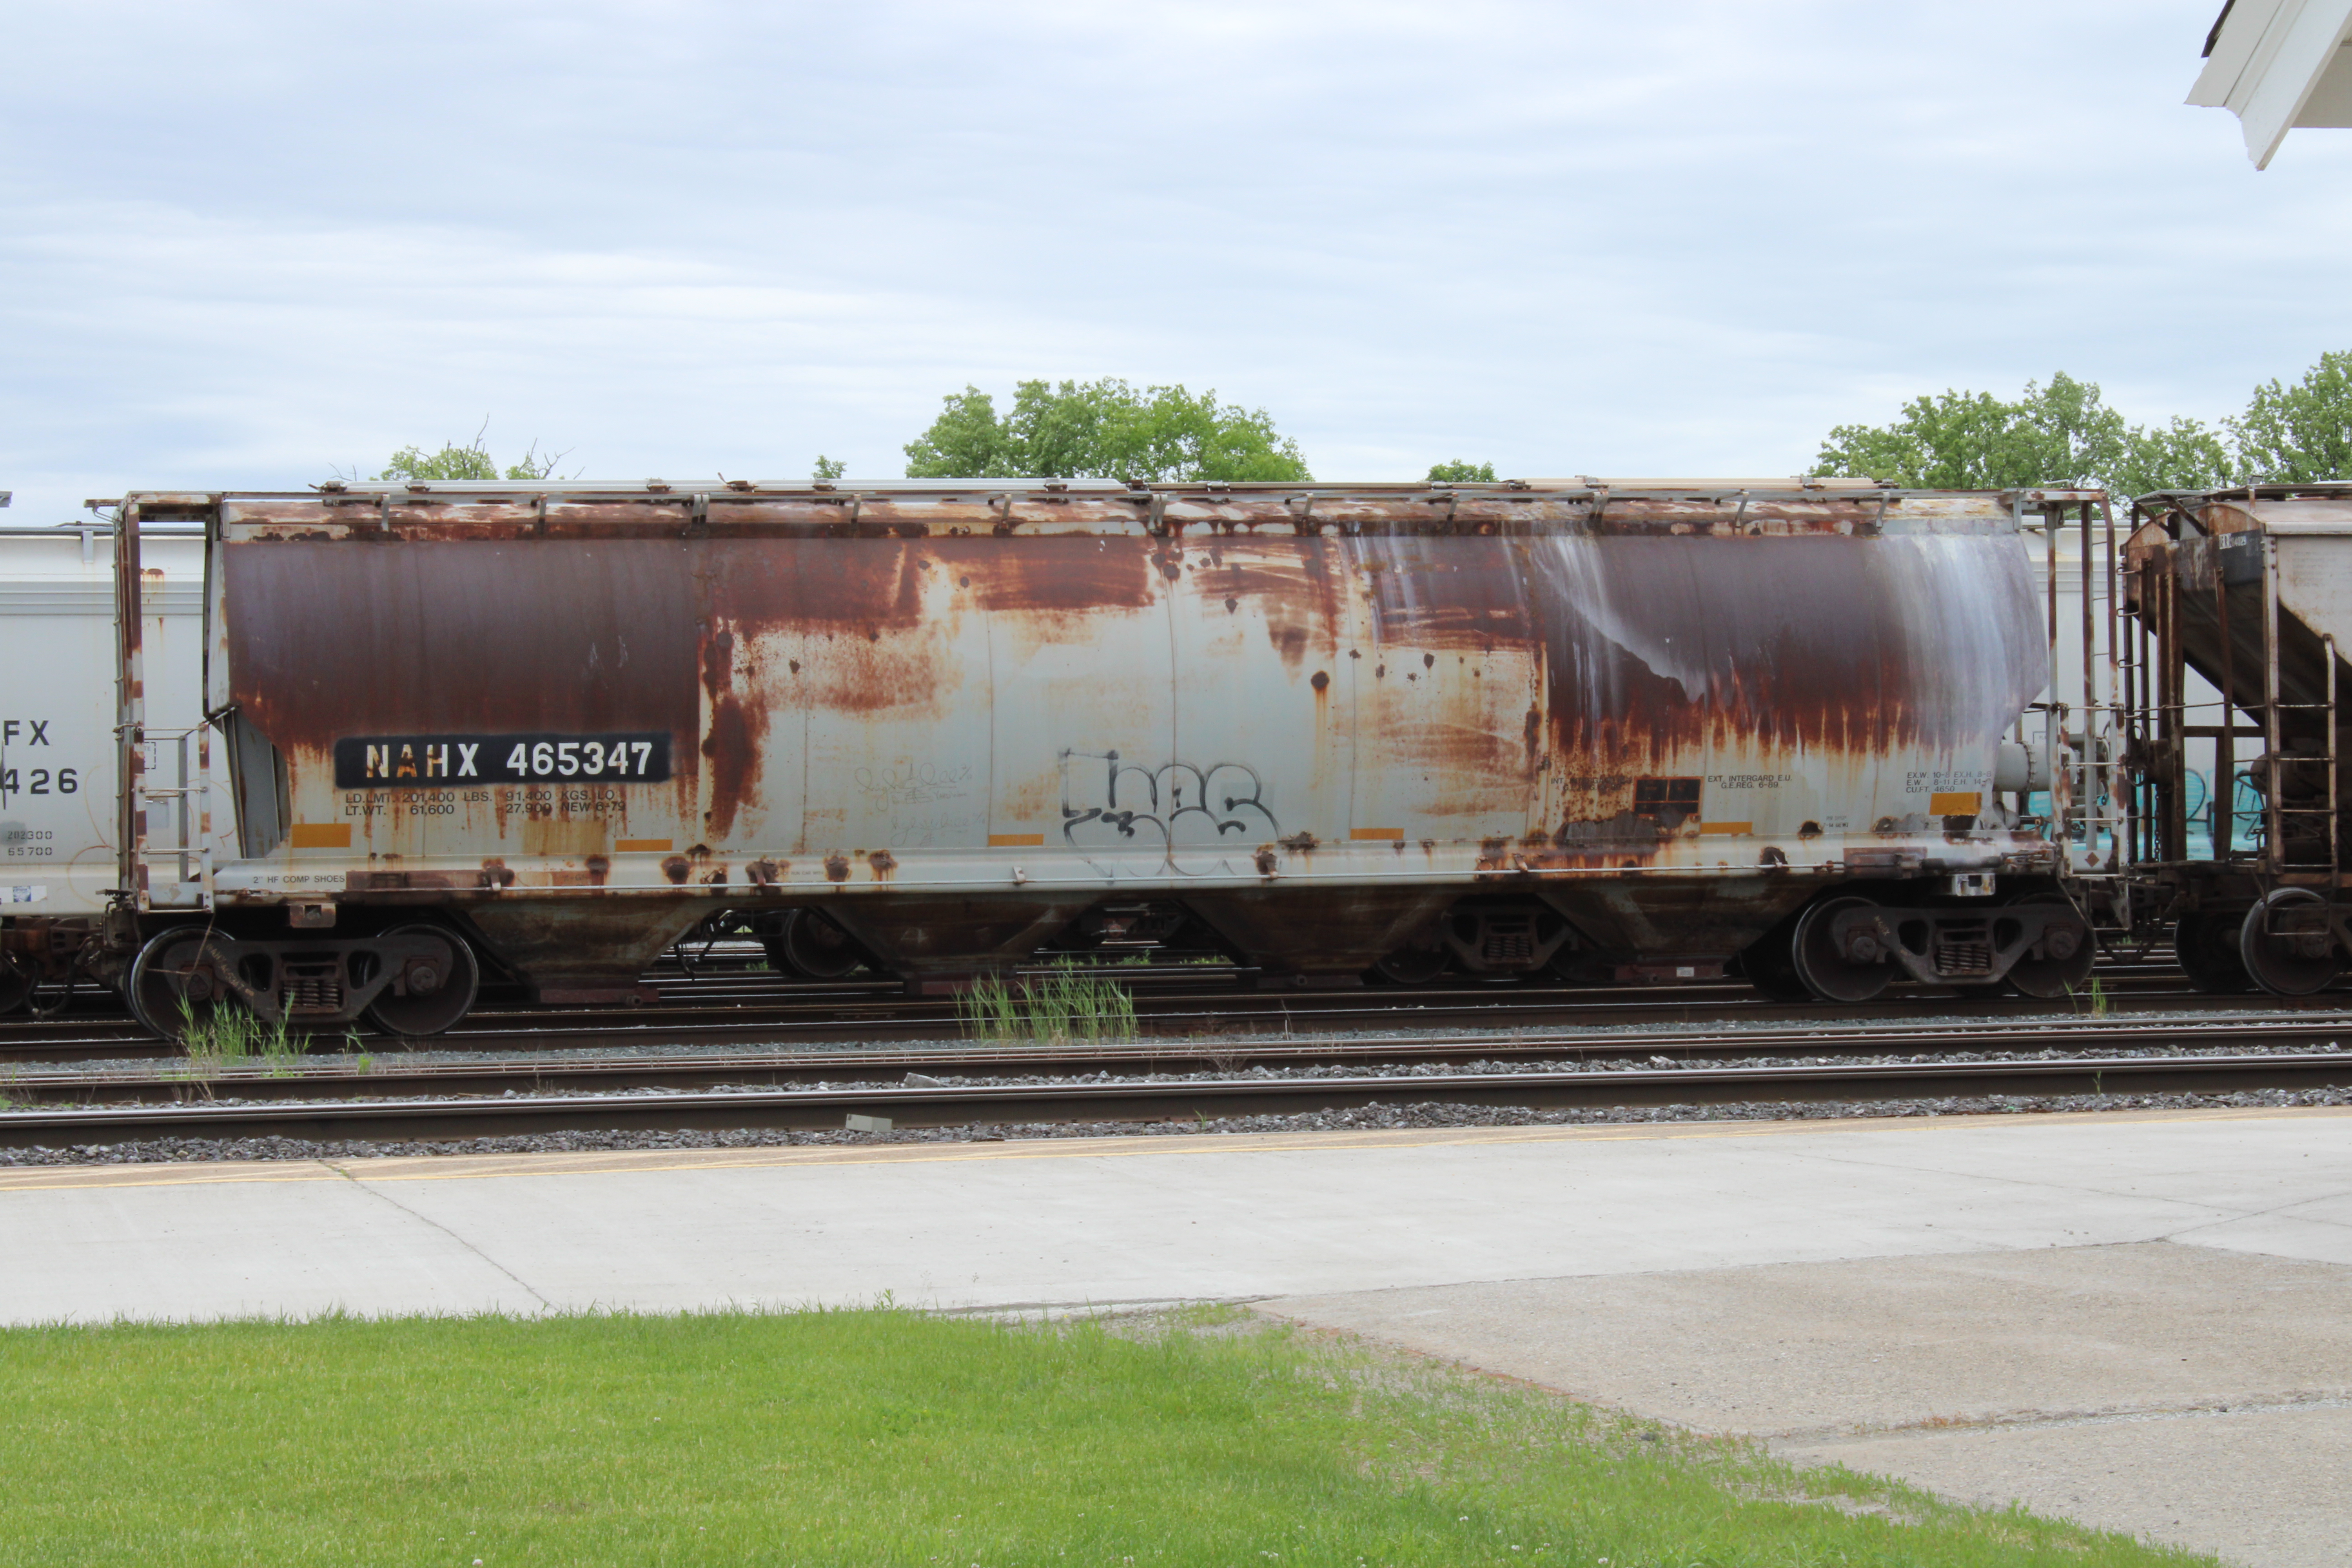
I picked up this Athearn 65 Foot Mill Gondola, lettered as Conrail 593289, 5 years ago at Gulf Coast Hobby (a great shop) in Sarasota, Fla.  It's sat in it's box in my cupboard ever since, but this past week or so I finally brought it out and weathered it.

I was sure I'd taken a picture of it in new condition, but I can't seem to find it, so with my apologies we'll have make do with the above view from Athearn's page.

The particular model I have is discontinued, but it looks like Athearn is doing another run with some other roadnames.  This link will take you to Athearn's page about their Mill Gondola.

http://www.athearn.com/Products/Default.aspx?ProdID=ATH76549

I searched for photos of the prototype car with the same number, but couldn't find any, so I just did what I felt might be plausible. Made me kind of wonder just how Athearn came up with this car number. The few pictures I did find of similar cars all seemed to show them as nearly new, or at least very clean.

The interior of my model has been rusted up using RustAll from Hobby Lobby that I've used and shown here in the past. I then went over the entire outside of the model with Tamiya Panel Line Black, which really darkened down the whole thing.

The Tamiya Panel Line and Flat Clear.  The Panel Line product is available in brown and gray as well.

All of the graffiti, which is done on one side only, is decals from a number of Microscale sets, some of which were from older sets, while some are newer.  With them snuggled down nicely over the ribs and rivet lines, I sprayed thinned layers of Rail Brown over the decals to take down the shine.

Here's the model on the workbench, with the interior done and the outside panels are darkened down, but those graffiti decals sure look clean.

Speaking of clean, here's a look at the underside of the gondola, just to show the colour the gondola was before I went over the sides with the Panel Line Black. I've long thought about trying to model the piping detail on freight cars, but I really don't know what to use for the piping.

I think that the graffiti looks a lot better when it's been dulled down with the Rail Brown to look like it's been there for a while.

I got the car all finished up, took the above picture, and then realized that I'd forgotten to add the reflective stripes along the sides.  Again, with no prototype photos to go by, I placed the Smokebox Graphics stripes where I thought maybe they should go. 
Here we go...FRA stripes in place

And just another look, with a nicer view of the rusty interior. I don't have a load for this gondola  - yet.  I was thinking maybe a removable pipe load.

One more thing...

Couldn't help but notice what appeared to be an uptick in on-line selloffs of pre-owned HO scale GP9RM and Slugs in the last couple of weeks since Rapido announced they've got their own sets coming out?  Seems many that have the older Kaslo Shops kit, Overland Brass models, and perhaps Maple Leaf Trains kit would prefer to have the Rapido version.

If you haven't seen it yet, the Rapido models look real nice.  Real nice. Here's a link to the Rapido site page for the GP9RM and slug:

https://rapidotrains.com/ho-scale/diesel-locomotives/gp9rm.html

Saturday 18 June 2022

HLCX 5556

There really hasn't been a whole lot happening with the layout this week.

I did happen to find this very simple scratch-built billboard from a few years ago. I had removed it a couple of years ago (has it been that long) when I was doing some ground cover work.  When I came across it, while looking for something else, I decided to put it out again.


The billboard is now located in a high visibility spot, next to what I call the Gratiot Avenue overpass.
I should really put a safety railing along the billboard's walkway

And the "something else that I was looking for when I found the billboard was the remaining parts of a chain link fence kit that I knew I had somewhere.  I'm wanting to put fencing around the perimeter of the burned out Gulf station.

That's fence posts on the right hand part of the sprue, and half of a 2 section gate on the left. And the wires for the top and bottom chords at the top-left of the picture.  The wires aren't straight though, and that makes assembly "challenging" at the least.

JSSX 815 is going off the layout for a while, as I try to make myself add the horn to it.  In it's place, the shortline has brought in a leaser engine.  This time it's HLCX 5556 from Helm Leasing.  This has been posted on the blog before of course, but here it is again at the maintenance shop anyway.

I've always liked the way the weathering turned out on this one.  As a 6-axle leaser, it doesn't get to see a lot of service though.  Too bad, as it looks a whole lot better on the layout than it does in the storage cabinet.
I remember looking at this Kato engine at the Woodstock train show 3 times before I finally decided I'd better buy it.  It looked nice in the original CP maroon and grey.  I think it looks a lot better now.


Friday 10 June 2022

Views from Above

I don't know of any model railroaders that don't like and admire Lance Mindheim's layouts. I like them in particular because he does so much city type scenery, with tons of industrial and commercial buildings and switching. I try to do something similar with the theme here, but he's a lot better at it than I am. I get lots of ideas from Lance, and actually follow through on some of them. 

Here's a short and fun Youtube video, less than 2 minutes in length, from Lance of his Los Angeles Junction, a small switching layout.

https://www.youtube.com/watch?v=Z_xhGivWzUc

As I was watching this, I thought to myself I'm going to have to get a step ladder out after this.

So I did.

I didn't make a video, but I photographed a few views from above of different areas of the layout. I took about a dozen photos in this exercise, but these are the 3 that turned out the best. Nothing like photos from the layout to help us see what areas could use improvement.

Have a look at these overhead shots from high above the JSSX.

This view of South Industrial Blvd. includes vehicular traffic

GP38 813 (top) and 815 (in red), as well as Dash40-B 5068 (far left) outside of the JSSX maintenance building.  Might sound a bit funny, but this picture has reminded me that I still need to install the horn on 815 (forgot all about it).

And this is a look down from above at Ferrous Processing metal recycler. Two loaded gondolas, and an empty sit on the spur.  That's a UPS delivery vehicle at the bottom of the photo.


And back to the real world,  I had to hurry to get this photo of AEX 13838 as it had just passed me on train 382 Tuesday afternoon.

Interesting that the side looks mostly sort of pink, but the slope sheets on the end are white.

Saturday 4 June 2022

A Couple of Freight Cars Weathered

 I've changed up the blog's header photo for the month of June, this time featuring my personal favourite locomotive, the JSSX 813 (formerly 815).  It sits outside of the shortline's maintenance shop waiting it's next trip around the railroad.

I thought I'd show a couple of freight cars I've just weathered up for Jamie B. I really like this first one, as it's kind of unobtrusive looking, and should blend right in to any train.

I darkened down the brown on this one by placing very small dabs of Ivory Black artist oils at the upper inside edges of the ribs and pulling a dampened flat brush straight down. I masked off the reporting marks and data before making a couple of quick vertical passes of the airbrush with really thin Craftsmart grey on the panels between the ribs.

Not always easy to get the graffiti decals to settle down over the ribs and the ridges at the door.  After a couple of applications of Micro-Sol have dried, a sharp new Xacto blade will make for a nice clean slice through the decal.  Then another application of the Micro-Sol and the decals snuggle right down.

Same goes for the graffiti on this RBOX.  When everything is all dried, I sprayed very thin Rail Brown to add some grime.  Less along the middle area and more at the top and bottom.

The original lettering was first removed and then replaced with a RBOX ghost decal lettering set from PDC. The PDC decal sets are made specifically for this type of 6-panel boxcar

Back in the real world, I happened to see this quite weathered covered hopper across from the station down at the Sarnia C-Yard

This car was the only cylindrical one in a long string of 3-bay covered hoppers.  My guess is that they were either on their way to, or had come from, the grain elevators here in Sarnia.