Saturday 27 March 2021

CNA 798000 Boxcar

Those new Tangent 86 foot auto-parts boxcars are nice.  Really, really nice actually.  But I've got a bunch of the older Athearn models running around on the layout. They can be had, often new in the box at train shows for $5 to $15. With just a little upgrading, I think they look fine, and operate much better as well. Here's my latest addition to that group of freight cars

First picture shows the extra weight I've added to the inside of this boxcar.  I find that simply adding a couple of half-inch steel nuts epoxied onto the stock steel weight really help with the tracking of these boxcars.

The Athearn cars of course came with plastic wheels, so I change those out for metal wheels, which I paint and add rust powders to.  The stock Athearn coupler system for these cars is pretty archaic, so I've changed them out for Details West coupler boxes, which look and operate a whole lot better.
After a little cleanup with a file and painted flat black, the Details West CC-1024 cushion coupler pockets replace the stock Athearn coupler style.

I actually kind of liked the way the boxcar looked just in the primer, and for a moment wondered about leaving it that way. 

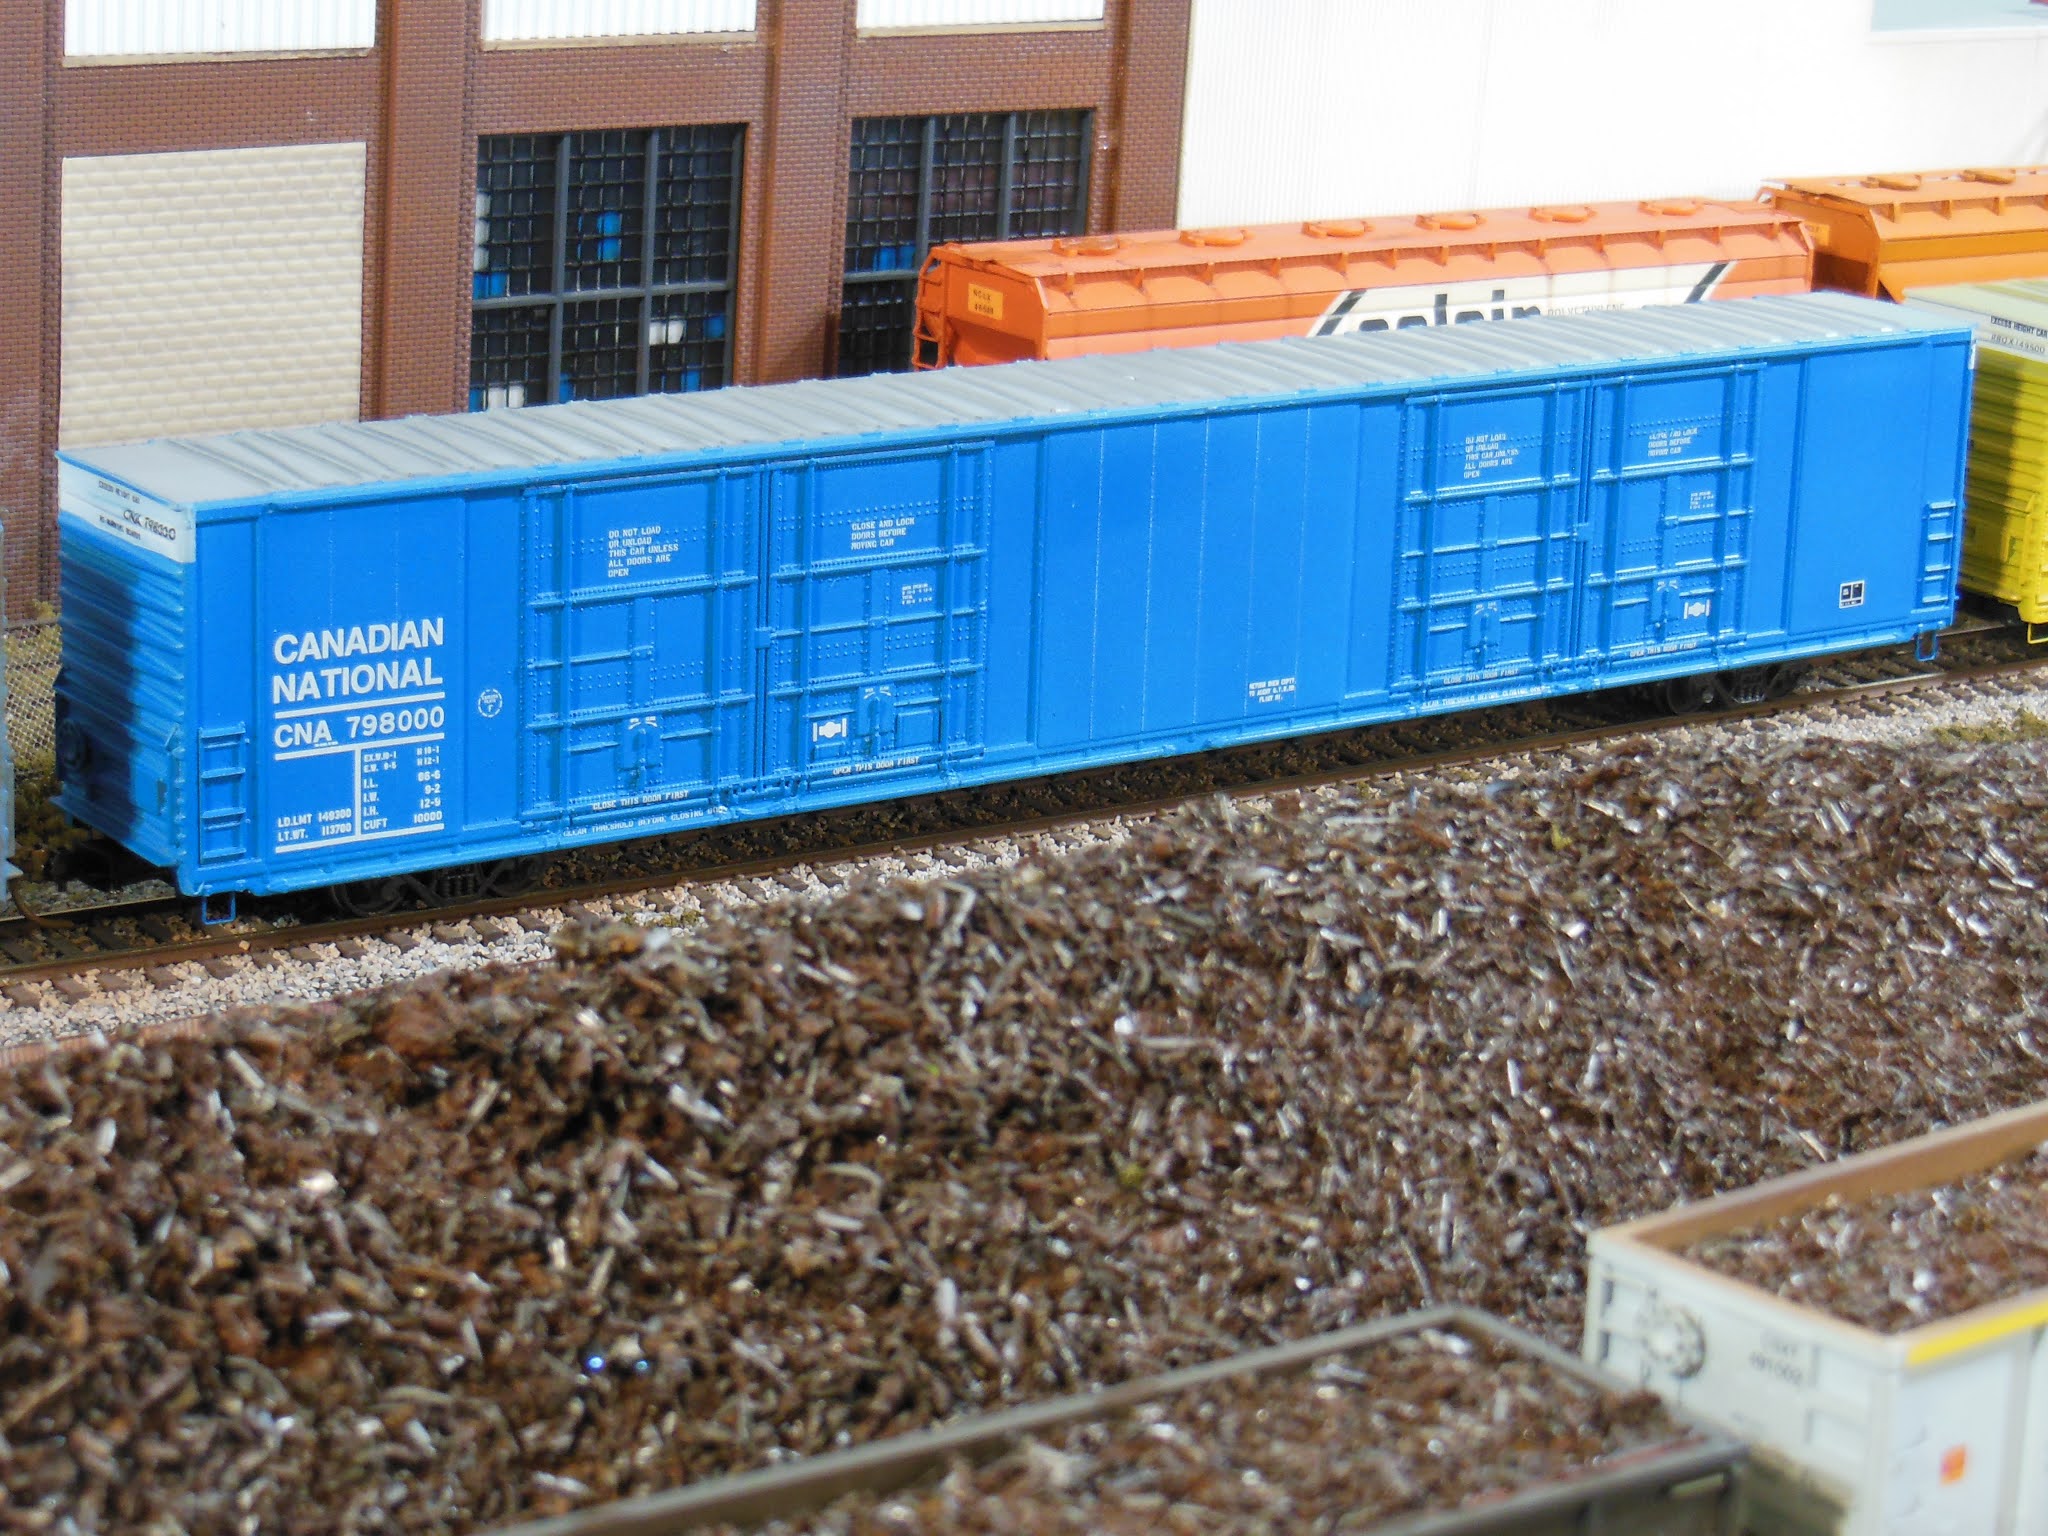
However the forces of common sense prevailed, and I went ahead and painted the model blue as it's to be a car that's been re-painted and re-lettered from GTW to CNA. I'll be wanting to have the model appear at least a little bit faded, so instead of using GTW blue (a pretty dark shade), I first tried Rock Island blue, but that turned out to be too light in colour for what I wanted.
Rock Island Blue looked to be too much of a powder blue shade.

I ended up spraying L&N blue overtop of the Rock Island Blue and liked the result much better.
After the paint had dried overnight (and much of the next day) I had masked off the ends in order to spray white in the upper areas for the Excess Height and car number decals.

After cutting out and applying a total of 50 separate decals to the boxcar, I cut off the oversized plastic stirrup steps, and replaced them with etched brass ones.  Here's my finished, but as of yet unweathered, boxcar out on the layout on it's first trip to the auto parts plant.


The 26 feet greater length than the 60 foot high cube boxcar behind it is evident in this photo.

Saturday 20 March 2021

Weathered Tank Car

 I bought some (Atlas) tank cars recently, with the intention that the JSSX would be able to spot them into the transload spur.  Two of them are stencilled to carry corn syrup. The 17360 gallon tank car below however is labelled for chlorine service, and I didn't really know of a reason that chlorine would be used at any of the other industries along the layout.  I'd just as soon have it coupled up with either of the other two cars at least occasionally at the transload spur, so I've decided to remove that chlorine stencil.

This tank car has (or had) the Chlorine label above the saddle at the right-hand end.

The chlorine stencil is low enough on this car that I used the quick and dirty solution of simply covering it over with a small piece of black trim film. With a little further weathering, you'd never know it was there unless you specifically looked for it.
I sprayed the whole car with flat black to tone down the shine, and the trim film has blended in very nicely as a result. The wheels and trucks are also painted and have had weathering powders applied to them.

I wanted to try to show that some of the paint has weathered away along the top of the tank car.  To begin I sprayed a very light coat of quite thin light grey paint in those areas.  Following that, a bit of light brown is sprayed over top of the grey.  The brown would not really be visible if sprayed directly over the black, so that's why I applied the grey colour first.

I still had a bit of the flat black in a mixing cup, so I gave a quick spray of that around the edges of the brown areas just to blend everything in a bit better.
The overhead view of how the black paint appears to have weathered and worn over time.

Saturday 13 March 2021

CN Combination Door Boxcar 598475

The photo at the top of the blog for the month of March features a single boxcar being pulled toward it's destination by JSSX 815.  I thought I should feature that boxcar, as it's the first car (not that there's been many), that I ever really put under a knife, saw, and of course paint.  It's probably the oldest model in the current inventory too. We won't look too closely at the boxcar data stencils though, as they're for a fifty foot boxcar.

It must have been at least 25 years ago that one of the model railroading magazines (Model Railroader I think) had an article about how to kitbash 2 Athearn blue-box boxcars into a CN 60 foot combination door.  At the time, I was interested because I had seen lots of those cars passing through here on freights going to and from the USA, and I still see them occasionally.

I believe that the prototype cars were built for CN by Trenton Works in Trenton, Nova Scotia. I like the "long and low" appearance of these type of boxcars.  A much different look than the high-cube cars we see so much of these days.

Here are a few looks at the combination door car as it proceeds along the JSSX to the consignee.

Here, the 815 has coupled onto the 60 footer and is just about to leave the JSSX yard

The same photo as this month's blog header. The track switch that the engine is on is where the South Industrial branch begins.

About to roll beneath the highway overpass

Passing behind the old control tower, which has been closed down for a few years now


Once it reaches the in-street trackage of South Industrial Blvd., 815 had to run around the boxcar in order to shove into the customer spur (kinda fun).

Made it to destination and will be picked up again in a few days.

This week, Brian Smith sent along this photo he took of a 3-bay covered hopper at St.Thomas.  If looking for a nice under-stated weathering, this would be a good example.  Subtle colour difference from the original paint to the re-painted portion, and the beginnings of some light rusting along the top portion of the car.  Brian points out the single set of new wheels on each end.

Thanks for the photo Brian.

Saturday 6 March 2021

Loading Ramp / TransLoad Progress

I actually followed through on last weeks' mention of re-painting the loading ramp because I wasn't happy with the way the "cracks" I had drawn onto the concrete had turned out.

Here it is, still on the workbench.  I first cleaned off what I could with some alcohol and then sprayed it with ModelFlex Concrete Gray.  With that done, I thinned down Grimy Black and sprayed that in several light and quick passes to leave tire tracks where where I figure lift trucks and such would drive on the concrete.


Next was to try to highlight the expansion cracks in the concrete.  Using the newest and finest (0000) brush I have, I very lightly dabbed AK Interactive RailRoad Wash into the cracks and watched with interest as it ran through the cracks.  That colour was a bit "bold" so I went over the cracks again in the same manner with Vallejo Dark Gray wash to darken it down a bit.


I don't think there are many hard working outdoor lift trucks out there that don't drip some kind of oil or fluid, so I flicked some Vallejo Oil Stain from an older brush onto the surface of the ramp as well.

I used these 3 AK and Vallejo weathering products.

If all goes well, this should be able to become quite a busy spur for the JSSX short line.

I still have a ways to go for track ballasting and ground cover in this general area of the layout. However, flat cars, box cars, and tank cars (when I can get a suitable tanker truck) for transloading will be able to be spotted into this spur.