Saturday 28 May 2022

Grade Crossing

Writing back and forth a couple of times with friend Sean Steele this week, he pointed out to me that the asphalt between the rails at one end of a level crossing on the layout didn't really look right, and could maybe be modeled a bit better.  He sent along these two photos below to show me what he was referring to.

Sean felt that the asphalt in the area circled in blue would not be tapered down the way I had done it. The crossing is .020 styrene, trimmed to fit between the rails and painted.


Making a long story at least a bit shorter, I spent an hour or so cutting a replacement piece of styrene and dropped it into place.  It's a press fit, and yes, the "20 thou" sits low enough below the code 83 rails that it doesn't cause any problems with wheel flanges and derailments.

I'm not convinced this is actually any better than what I had there before, but it's done now so it's likely to stay this way.

Also in the photo, I'm sure you can't help but notice the masking tape, which surrounds the area where the old Gulf station is being located. Gravel and ground cover, spread loosely in the photo, will be glued down and then the tape removed, which will hopefully leave a clean area for the station and lot to drop into place.

I know that's a way-too-big and obvious curb where the asphalt road meets the concrete.  I'll try to fix that after I find my hydrocal.  I've got some around here someplace.

I found this video demonstrating how to create tracks in pavement, also known as street running interesting.  The idea seems to be to basically make a styrene "tray" to fit in between the rails (allowing for flangeways inside each rail of course), and then fill the "tray" with "molding paste", whatever that is.

I would think that wall spackling should work as well.  Anyway, the tray would be made of .020 styrene for the bottom, and styrene angle (Evergreen) for the sides and ends.

If I ever get caught up on my far-too-many other projects here, I think I just might have to experiment with this. Here's the link to the video...

Model Railroad Buried Track Final Tutorial | River Road - Vlog #72 - YouTube

Saturday 21 May 2022

Gulf Station and a Couple of Other Things

Well, I didn't get as far along on the Gulf Station this week as I had hoped.  I thought I'd be adding a few touches and then be able to get it installed into it's place on the layout.  I got most of my finishing touches done, but the model is not really installed on the layout.

But it's hockey playoffs time, plus the Jays baseball games.  Those are my reasons. Or excuses.

What I did get done was to cut up and scatter a bunch of paper litter around the building and site, as well as a couple of old boards.  Then I cut out a bunch of graffiti decals and put them on the building as well.  A bit of the graffiti is hand scribbled by me.

I had mentioned last time that I'd like to change out the plywood covering the window on the right, but with the graffiti added now I kind of like it, so I'm going to leave it.

Here's a few newer photos to have a look at.  Keep in mind that the (former) Gulf station is just sitting loosely on it's designated spot and still need to be blended in.

If I was driving down the street and saw this, it might be just enough for me to check that the car doors are locked.

Now, in this 3/4 view, I think that the left hand end of the building needs just a touch more grime in the white portion where the graffiti is.  Just enough to help everything blend together a little bit more.

I think I'd better try to hide that small gap between the model's base and the styrene base I made with a little bit of sand/gravel. And I'm thinking about if there should be chain link fence around the perimeter of the lot now too.

Switching gears now, I thought this photo taken in early April, at Sarnia turned out well. I've cropped it down quite a bit to eliminate part of a vehicle and someone's camera tripod that was in the foreground.

I looked it up, and GP38 #4708 will be turning 50 this November.  Here, it's working at Sarnia's C-Yard in March 2022 with the even older GP9RM 7025, built in 1958.

Shipping season is well underway now of course.  Here is the unusual looking lake freighter John D Leitch seen downbound as it enters the St.Clair River this past Monday May 16th, 2022.  I think it is coming from Goderich, bound for Toronto with a load of salt.
At the right-hand side of the picture, running about 10 minutes behind the Leitch, the Saginaw can be seen as well.

We waited the extra 10 minutes so I could get this picture of Saginaw.

Saturday 14 May 2022

Gulf Station (Part 2)

 That gas station that I've been chipping away at is looking like maybe it has seen better days.

With an assortment of gas station signs included in the kit package, I chose to try to make this a Gulf station. I masked off appropriate areas of the building, and then sprayed an orange craft paint that at least approximated the colour that Gulf uses.  But then I decided to not use any of the signs, as this station has been closed up for some time.

To begin that aging process, I removed bits of the orange with just a tiny bit of alcohol dabbed on a Q-Tip, trying to allow some of the original white to show through.

For the roof, I cut a piece of thin cardboard to size, and then using 3M 77 as adhesive, laid a single ply of tissue over the cardboard to try to give the roof a bit of texture.  Masking parts of the roof off with a business card as I went, I sprayed a couple of different grey shades to represent rolled roofing lines.

This next photo should give a hint as to what's going on with this little structure.  A few years ago, George Dutka had given me a set of paper images of aged plywood, knowing that at some point I'd use it to blank out windows on a building.

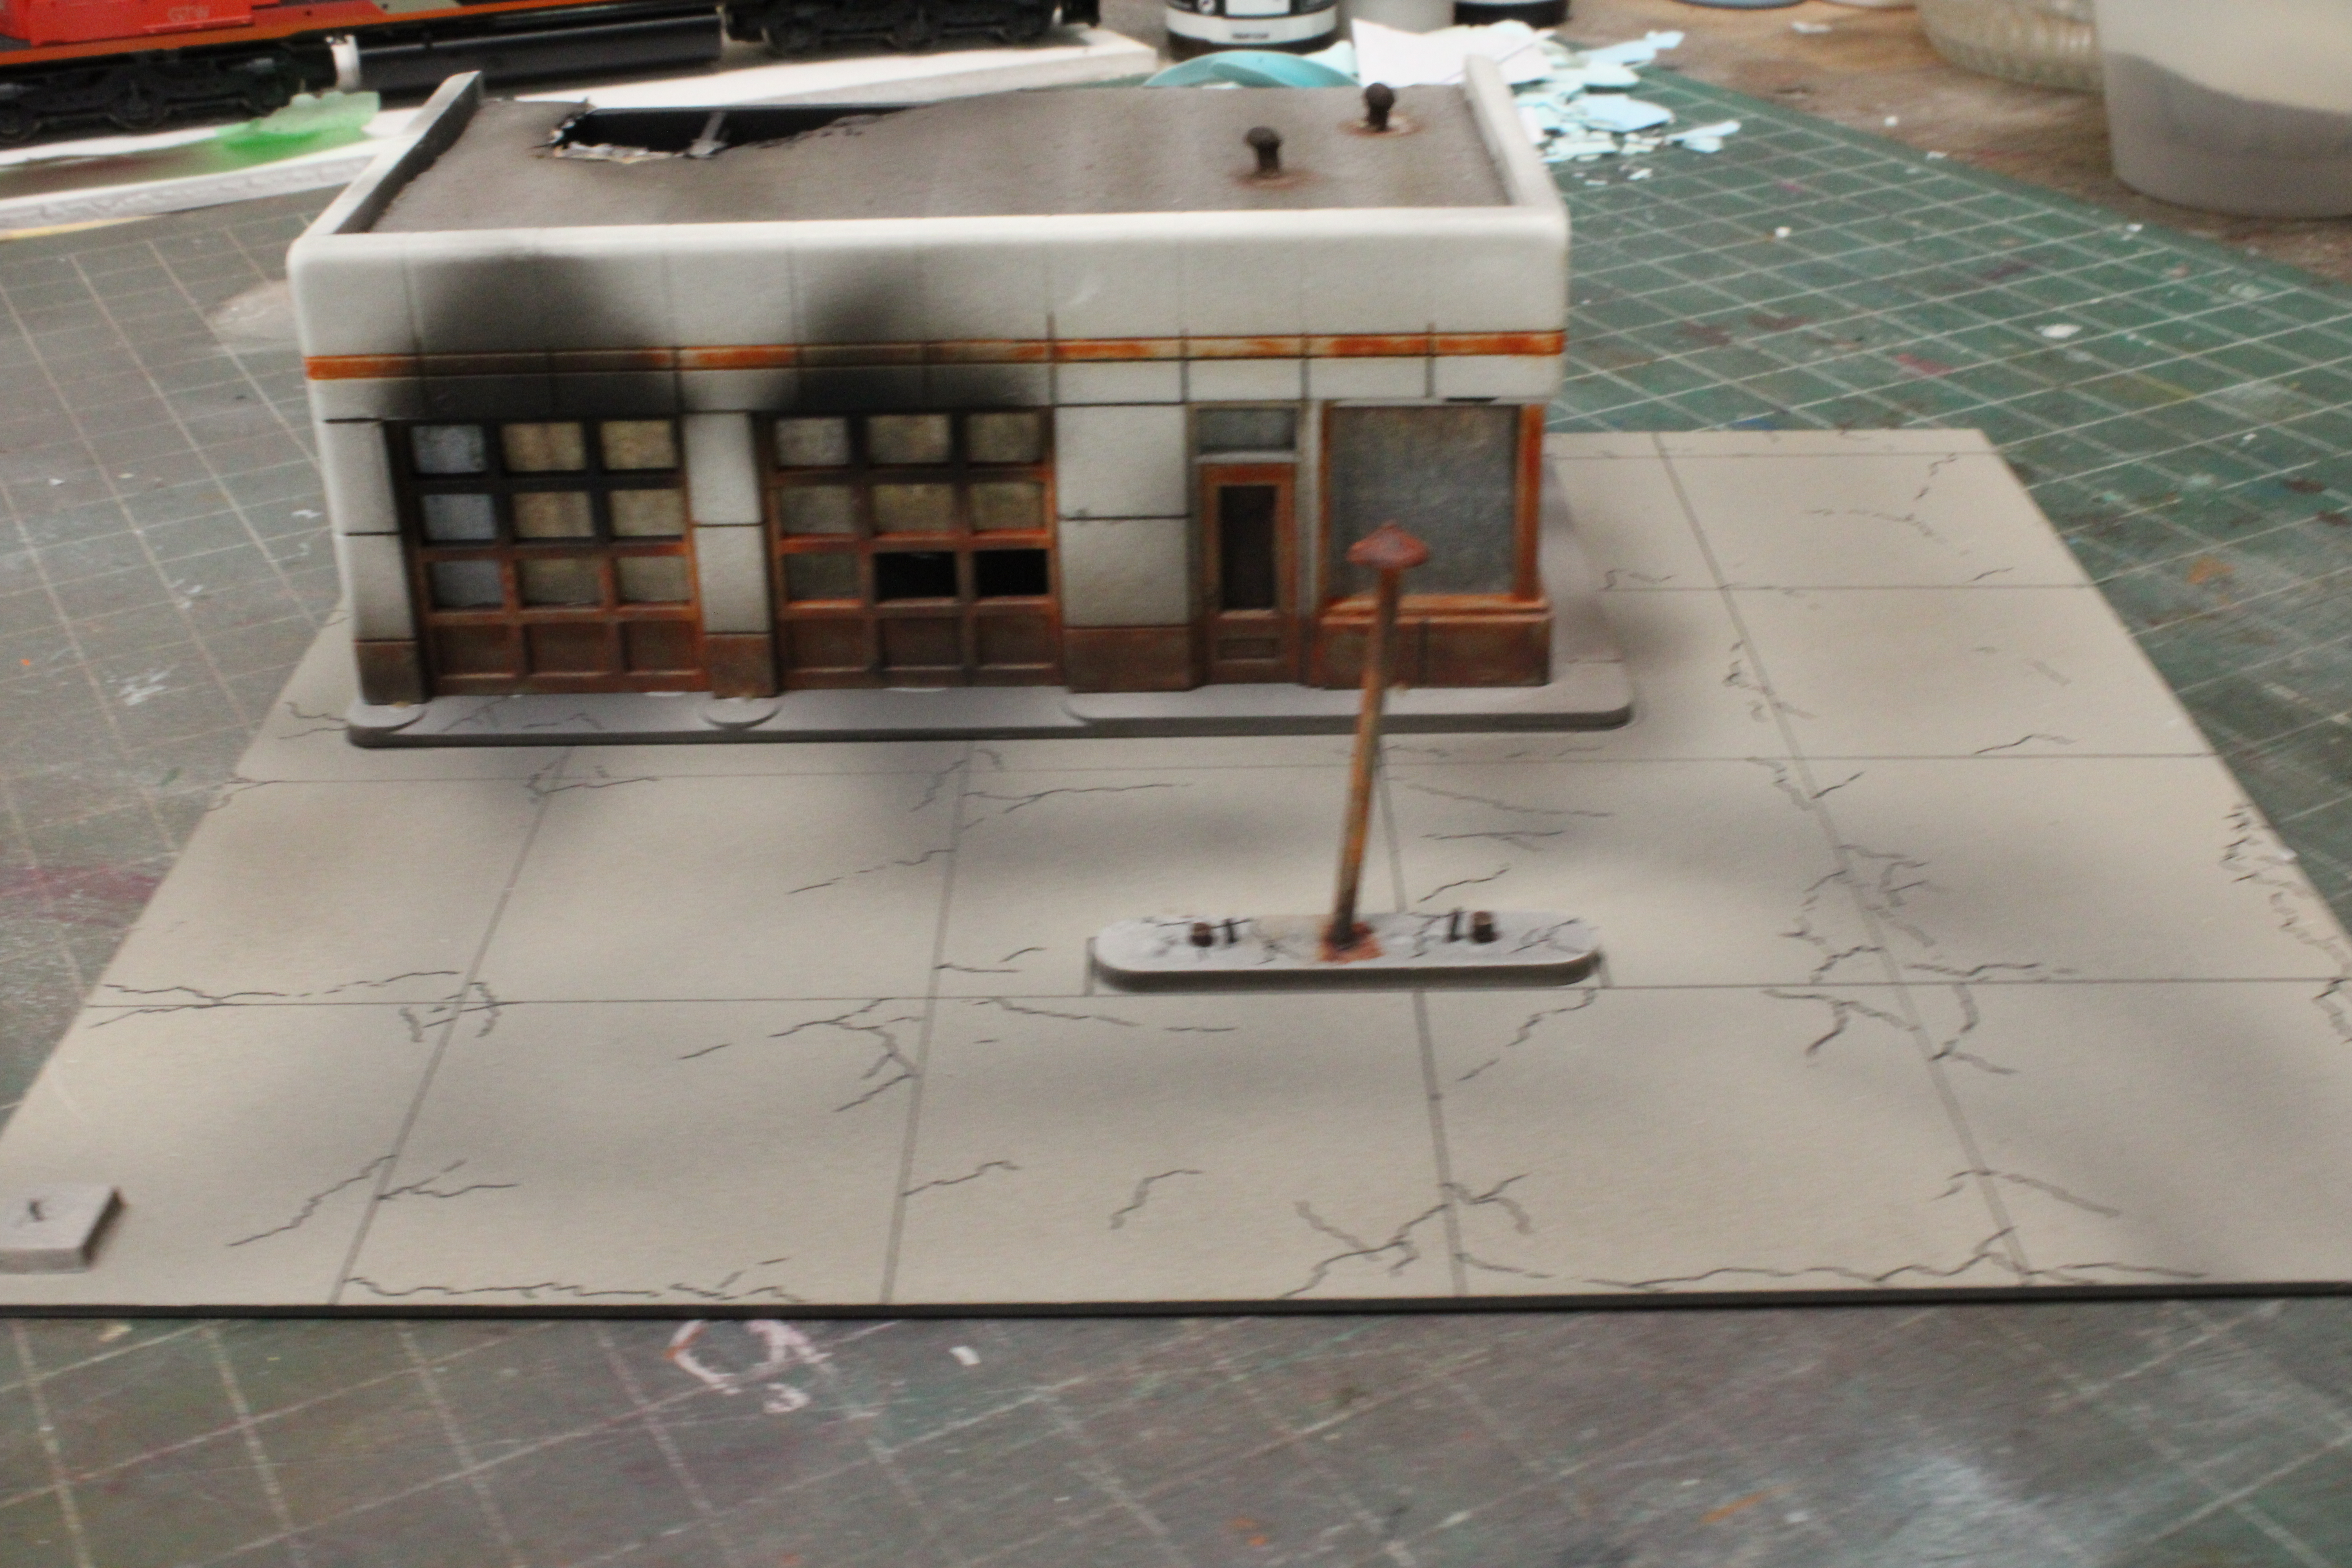
I'm not too crazy about the colour of the "plywood" piece that I've used to board up the large window on the right.  It's more blue-grey than I think I'd like, so I think that I'll probably replace it with one that's a somewhat cleaner plywood colour.  That's flat black that I've sprayed above the garage bay doors. It's the best I had that would approximate the look of soot from the inferno that may have been the reason for the business to close. Or maybe the fire occurred after the closure. Who knows, right?

I've cut a .040 styrene base to mount the building on, and painted it a concrete colour.  I drew a scale 12'x 12' grid onto the painted styrene with a very fine point black ink artist's pen to represent the expansion cuts and cracks in the concrete. The pen I used is a true black, not the blue-black that is used in Sharpie pens.

So here, you can really begin to see where I'm trying to go with this.  The gas pumps are long gone, but the concrete island remains, the Gulf sign and pole that would have been to the front left of the lot is also gone, but the concrete pad it would have been mounted on remains. The light standard on the island is leaning to one side, as though maybe a vehicle hit it at some point in time.  The lower area of the building has been given the once (or twice) over with grimy black.  

And so back to that roof.  Well, the roof has been burned through in a fire. Yes, literally.  I took just the roof outside (remember it is cardboard), and lit it on fire for a few seconds, doing my best to burn only an area that I had pre-determined.  I like to think that I'm just smart enough to not try that in the house.

Here are a couple of photos highlighting the roof.

I had couple of pieces of I-beam that I ran from the back wall to the front as roof supports.  I chose in the end to only have one of the beams showing through the burned out hole in the roof.  The roof vents on the left are above the office and washrooms. 


A view from the right-hand end


A little bit of sand as pieces of gravel thrown  randomly around the concrete, weeds growing up through the cracks, and some oil stains where the vehicles used to stop at the gas pumps.

That's where this gas station stands for now.  Hopefully I'll be able to get this actually onto the layout in the coming few days.

Friday 6 May 2022

This and That for May

A new month, so time for a new photo at the top of the blog.  This one shows GP38 #812, the newest on the JSSX roster here, on it's way to work the South Industrial (Blvd.) job.  This short train is about to take the diverging track, crossing the roadway to the right, and will then rumble underneath the highway overpass.

I like the picture, but I think that I must be my own worst critic because I always seem to see a number of little things that I don't like in my layout photos. But they're fixable 

In this particular picture above, I notice that at the road crossing in the foreground the paint has worn off beside the rails exposing the white plastic the road is made from.  Probably worn off by the alcohol I use in my CRX track cleaner car.

That track switch ground throw appears out of scale.  And that's the smaller size that Caboose Industries makes.

There's a bit of a gap at the corner of the fence at the scrap recycler.

And another thing that I notice is being able to see right through the windows of the grey building from back to front.


 Next: I had an email last week from George Dutka, of the White River Division and Modeling Maine In Narrow Gauge blogs. George wrote to let me know that he'd spotted a photo and description from my layout in Railroad Model Craftsman magazine's May issue.

Thanks for letting me know George!  This is the photo in the Boomer Trail section of the May RMC magazine.

Next again: If you recall my gas station kit project that I wrote about last week, here's a little update on the progress I've made on it so far. No, it doesn't look like much right now, but I'm hoping it'll get there. The trim is painted orange because I'm going for the appearance of a Gulf Oil station.

I put a couple of I-beams across the top of the garage portion of the building.  I would have much rather added steel roof trusses, but I simply don't have any of those.  The I-beams were available from my scraps box.  There's the roof over to the right, and of course the base is in the front of the picture.

And lastly this week, I took this picture of NOKL 818475 as it passed the station here in Sarnia. There's a blue-box version of this type of 3-bay covered hopper that Athearn made, although not in this paint scheme or reporting marks.  I've got one that's lettered for UNPX / Procor.  A car such as this would make for a nice weathering project.

Not sure what the little white stickers/labels are along the bottom sill.  Maybe just reflective, but there's half a dozen of the yellow ones also.