Saturday 26 December 2020

SSW 65003 Exterior Post Boxcar

 Back in September of this year, I posted about modeling an exterior post auto parts boxcar that I'd been working on, but wasn't finished at that time. Hopefully this link to my September post will work if you wish to have a quick look at that.

https://jssxrailway.blogspot.com/2020/09/more-8-door-boxcar-progress.html

I've finally just finished up this 86 footer a week ago, so here it is.

An Athearn car, this one has sort of been 20 years in the making for me. This, along with two similar Southern Pacific cars, were inspired by an article written by Mike Budde and published in September 2000 in Railway Modeler magazine.

Here's a few looks at the completed boxcar...

From what I've read, the SSW had 30 of these 86 footers.  Modifications include adding the exterior posts, remnants of the roofwalks that were removed from these cars, and I replaced the stirrup steps with wire ones.


My original plan for the "COTTON BELT" lettering was to paint over a Microscale decal set, but that wasn't really working out too well for me, so Sean Steele had these done for me.  All of the other decals, including the grey stripes, were from Microscale sets. The stripes, as expected, were far and away the most difficult and time consuming part of the project.

This is most of the paper backing from the decals that I cut. From past experience I knew I wouldn't be able to get the grey stripes to settle down over all those ribs and posts correctly in one piece, so I cut them into short pieces.  Lots of short pieces.

Here's SSW 65003 coupled with my pair of similar Southern Pacific cars that I've modeled previously.

Having the 3 cars coupled together like this is something I've wanted to see on my layout for quite a long time. Finally done!


Saturday 19 December 2020

BRAR Rolling Stock

 A few of Luc's custom painted and weathered rolling stock to show this week.  Lets start off with this triple threat of modern Trinity high cube freight cars, lettered for Luc's Brownville and Ashland.  I had these on the workbench for a few days to do some light touch-ups to some of the paint that had worn off or been chipped during shipping.

We'll begin with this view of the three Trinity cars coupled together on Industrial Boulevard along the JSSX...There's HLCX leaser number 5556 getting set to hook onto the 3 very sharp looking boxcars and drag them back around to the JSSX freight yard.  Note the large custom BA with the nifty pine tree graphic on the right-hand sides of the boxcars.

A closer look at the 3 individual cars is below...

The yellow reflective stripes stand out nicely along the lower sills of these modern boxcars.

Having the fresh graffiti on them certainly supports the modern theme that Luc is portraying with his rolling stock.

I wonder why the graffiti artist "X'd out" his work on this one.  Maybe he decided he's not such a fan of graffiti after all?

And then there's this RBOX fifty footer that I think Luc purchased through ebay.  One coupler pocket was broken off, and the wheels didn't turn very well.  The reason that the car didn't roll well appears to have been one coupler box rubbing on an axle. That's been fixed, and both couplers are replaced with Kadee number 58's, and the trucks/wheel sets have been changed out with those from a donor car as well.

The boxcar features ghosted Railbox graphics, lots of graffiti, remnants of some notices or seals by the door, and modern FRA reflective stripes.

The finish on the car was pretty shiny, so that's been flattened down too. 

And this view of the opposite side of RBOX 31235.  This side features stencil style lettering and numbers at the reporting marks.  A nice extra touch.

Saturday 12 December 2020

A Soo Line Colormark Car

 Have you ever seen one of those white Soo Line boxcars?  The kind with the large black herald lettering and the bright red door? The ones that always seem to be rusted and blistered beyond belief. Well, about five or six years ago, I bought myself a Fox Valley Models Soo Line boxcar at the train show in Ancaster, Ontario with the intention of weathering it and of course using it on the layout.

 And then I tucked it away out of sight...on purpose. The idea of weathering the white paint became intimidating to me. Then, earlier this year, Jamie Barron brought the same car (different number) for me to weather.  And I procrastinated doing the weathering on it too.  Well, the wait is finally over for these two.

Here's the "before" picture of my boxcar...These Fox Valley boxcars are super sharp looking straight out of the box, although I think that the stirrup steps seem a little large.  I like where it says "A Soo Line Colormark Car" to the right of the door.  It was apparently some kind of coding system for the car's use.


So, here's Jamie's after it's become weather-beaten...

And the other side as well. I sure hope he likes it.

This next one is mine...the same one from the picture at the top of this post.

And the other side as well...
I practiced a little bit of weather-beaten graffiti on it also.

And here are the two boxcars together in the JSSX yard...
As I said to Luc a few days ago, I think a string of several of these would look real sharp in a train.  I think I'll start looking for a few more for myself.

Saturday 5 December 2020

RBOX 31916

A bit of a milestone today, as this is post Number 200 for the JSSX Railway blog.  And not only that, I'm writing it on a new laptop since my old one crashed so mercilessly last month.

I received an Intermountain Pullman-Standard 5277 cubic foot RailBox boxcar last week from a friend. He didn't want it, and wrote that I could do whatever I wanted with it.

Challenge accepted...
The boxcar as it was when I received it, doors off, and the wire grab irons were removed too.  They had been included in a small bag in the packaging.

99% alcohol and a Q-Tip made quick work of cleaning up the sides of the boxcar.

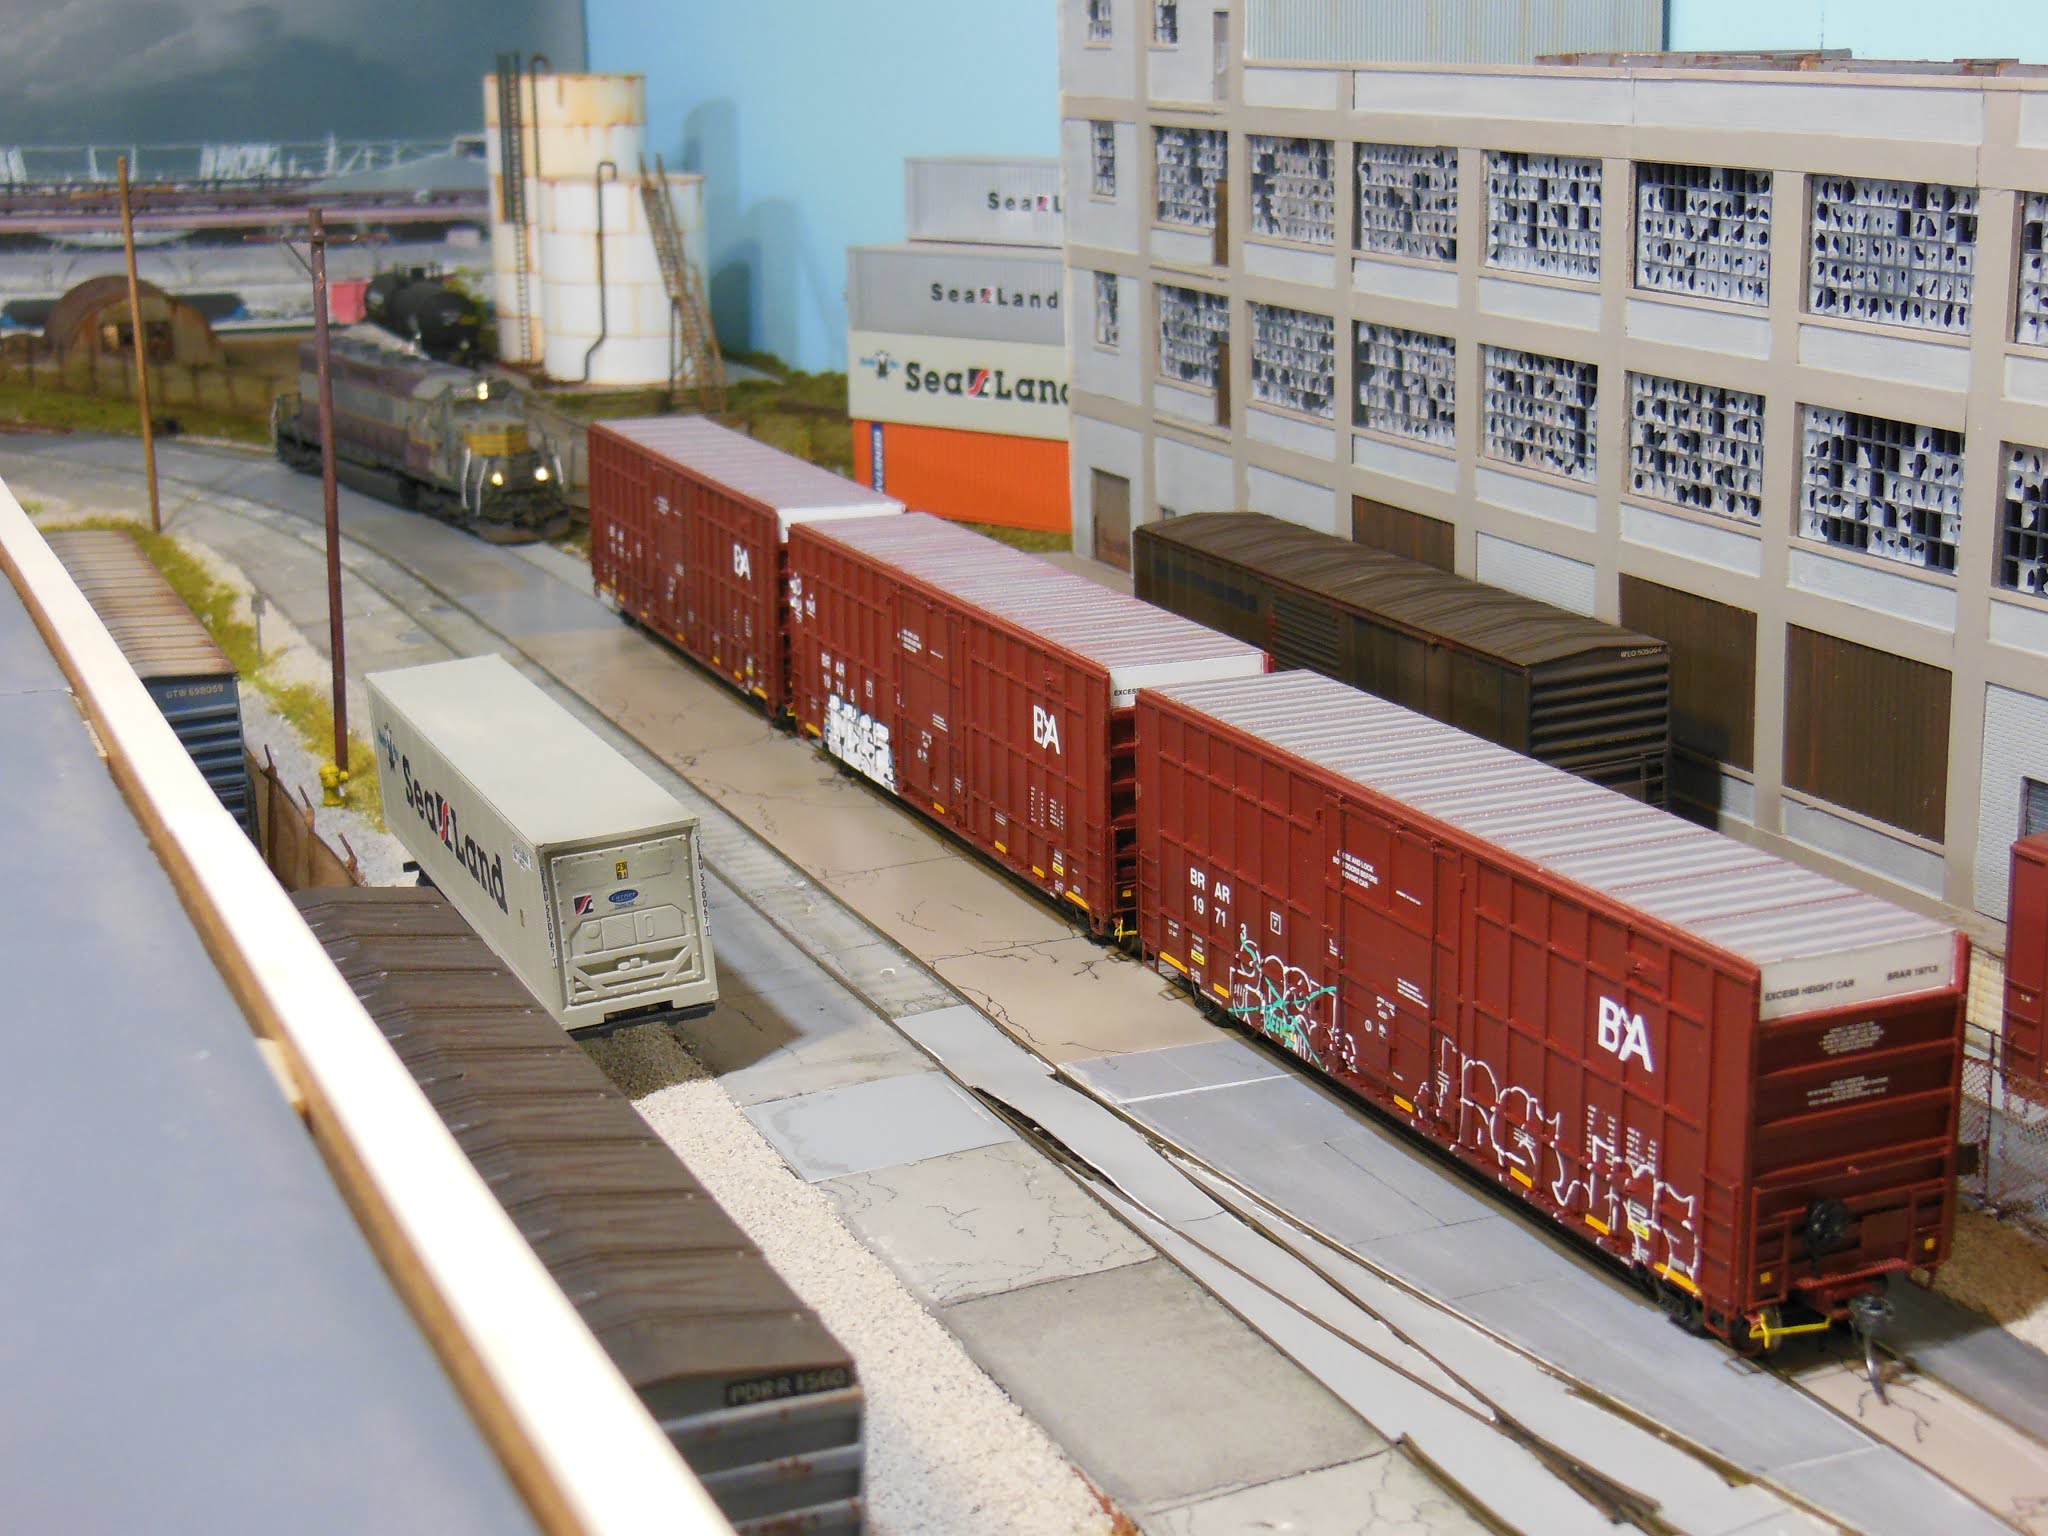
From here I'll jump straight to photos of the finished boxcar

I darkened down the shiny yellow with some thinned brown craft paint.  I really like the way the roof turned out.  That was done by brushing on 2 coats of Vallejo Rust Texture, and then going over that with AK Interactive Dark Steel powder, followed by Rust powder.

Rust along the various seams is AK Interactive Railroad Wash.  Great stuff, just a light touch of it and it flows right along a seam just as I wanted it to.

The RailBox graphics and the numbers are all from PDC Decals RBOX Ghost Lettering Set 4.  These are top-notch decals, but they are very thin and handling them can be tricky. The black parts of the graphics are my handiwork, as I used a fine-tipped brush to paint on some Flat Black to represent areas of the graphics that have not yet peeled away due to age and weathering.

Now, about that graffiti...I only put that on one side of the car, and I wanted it to look like it had been there for a long time. The graffiti to the left of the door is a decal from some set or other.  

Once that was all settled down into place and dry, I cut some masking tape and masked the basic outline of the graffiti on the right hand side. I airbrushed that area with some grey craft paint and then carefully removed the tape. I used some pink and beige paint to colour it in a bit.  The entire graffiti area was then faded out with grimy black, as was most of the rest of the car.

Found in the freight yard, this is the other side of the boxcar.  The black patches are black decal trim film, and the numbers and data are from that same PDC decal set I mentioned earlier.