Saturday, 28 March 2020

2 Freightcars 2nd Time Across the Workbench

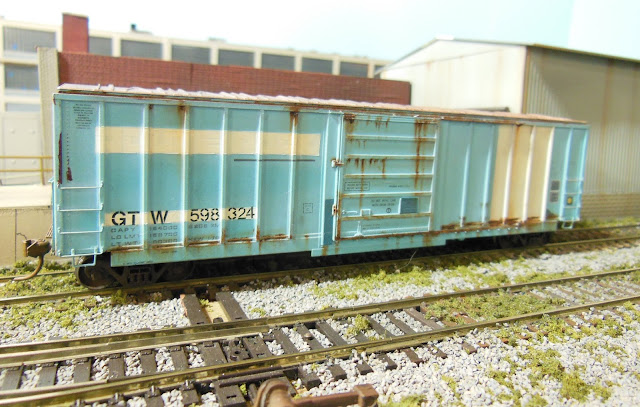
Back in February I posted up a couple of Exactrail Evans boxcars, including this one.  It was actually one of two that I had weathered and patched to GTW reporting marks.  I half-threatened in that post that maybe I should or would re-work it to something I'd like a little better.  Well, that maybe has turned into this post.

I also had this other Exactrail Evans boxcar in my cupboard that I didn't at all like the way it had turned out.  Here's what it looked like, below.  No one wanted to buy this at the Woodstock train show last year either, and really, I don't blame them. I mean, the rust streaks were alright, but the blue patching was "overpowering" at best, and I hadn't faded the original blue down properly.  (I like to think I'm getting better at that now).

I figured that as long as I was going to re-do one car, I might as well re-do two.  So, out came the 99% alcohol and Q-Tips, and over the course of the next hour or two, off came the weathering and the patching.

With that done, I faded the original Rock Island blue with ModelFlex Concrete Gray.  That's such a great colour for fading paint.  I masking-taped off the areas I wanted, and sprayed a light gray where the patches were to go.  Reporting marks and numbers decals were re-done as well, and then the rust weathering added.

So now 598324 (seen above with the white patches) has become former GTW 598211, and looks like this...
The notice on the tack-board is a tiny piece of an orange price tag sticker.  I faded the colour of it with some thinned grey paint and stuck it on there.  If it falls off, well that's prototypical, and it'll just add to the litter that's scattered around the railway.

And a view of the other side...
The pieces of old tape seals at the door are small bits of white decal.  The door on this side received less of the fading, and is closer to the original colour of the model

And as for the boxcar that had the overpowering blue patches, it went through the same basic process as above, just masked and patched differently.  

Here's a look at the prototype photo that inspired the patching for this 2nd car. This photo by Randy Curlin, found on rrpicturearchives.net

I kept the colour difference from the new patching and the faded blue is much more subtle on this one. Here's a look...
I've painted one door with the same grey paint that I used for the patching.

And the other side...

And here are the two GTW patched boxcars together...
I like both of these boxcars much more now than before, so they'll probably see more time on the layout.

Stay safe out there everyone, and stay home.

Jim

Saturday, 21 March 2020

GLX Scale Models Derail Detail

First up, Brian Smith sent along this CP freight car photo that he took this week. As I told Brian, I'm not going to be trying to replicate this on a model.
At first, I thought it looked like boxcar's red paint had been water-blasted under such pressure that much of the red paint had been removed.  Note some horizontal lines of the remaining red.  But looking around on-line, I see that there are other boxcars with reporting numbers close to this one that appear somewhat similar.  So, some problem with the paint adhering seems more likely. This would make for a standout model though, if anyone makes a model of this type and size of car.  Thanks for the picture, Brian.

Along the GTW industrial line, this AFC 4-bay covered hopper waits on the lead for a car spot to open up at the MidWest Plastics plant.
The work crew (me) recently installed an operable derail on this lead, seen here just in front of the covered hopper.  Made by GLX Scale Models, I first saw this 2 or 3 weeks ago on Mathieu Lachance's excellent Hedley Junction blog.  Link to that post is below.


I ordered a couple of the GLX "between the rails" derails, and put one together in just a few minutes. I painted it with Railbox Yellow after assembly. Once in place, the derail does exactly that to whatever runs over it.

Here's my derail installed, and in the "open" position to allow cars and locomotives to pass over it.  I should mention that the cars did bounce a bit going across it, as did the engine.  I simply filed the derail down a little bit by the rails to solve that problem.  
I've been using a skewer to flip the derail open and closed as necessary.  Adds a little bit of realism to switching cars at the plastics moulding plant. I still need to make up a derail sign to place beside it.  I'll get to that sometime soon.


Saturday, 14 March 2020

International Flatbed Truck

I've been thinking for a while that the layout could benefit from a few vehicles on it's roadways, so I recently picked up this nice looking flatbed truck. Made by Boley, this one was packaged up as part of Walthers Scene Master line.  I figured I should be able to weather it and put some kind of load on the truck's bed.

A model of an International Truck with an 18 foot flatbed, held together by two simple screws, the model comes apart quite easily.  I couldn't see anywhere on the model indicating the model year of truck that this one would represent.

I took this photo mistakenly believing that this was as far as the truck could be disassembled, realizing afterward that the frame is two pieces, as is the cab's interior.

Here we have the truck fully disassembled, but with the components weathered.  I used Burnt Umber and thinned black acrylic for most of the weathering.  The truck's bed was done with layers of primer red, flat aluminum, and rust, with chipping fluid used in between each layer to try to get a used and worn look.

After weathering, here's the truck re-assembled...I even went over the tires with the burnt umber acrylic.  A couple of things about the model that I wish were included would of course be a driver figure, and license plates would be a real good touch as well.  I'll have to try to come up with something for the license plate.

I loaded the bed with a 4 foot x 12 foot section of plate steel, as well as an 18 foot length of steel I-Beam. The sheet steel is .010 styrene painted  with dull aluminum and a light spray of rust.  The I-Beam, a piece of Evergreen Styrene, is painted with light oxide red.  I noticed that there was a bit of a shine on the tire treads, so I ran them back and forth over some black weathering powder to flatten that down.

The tie-down straps are made from masking tape that I cut into very narrow strips, about 3 scale inches or so wide. It looks like the plate steel was loaded and tied down first, and then the I-Beam was loaded after that.
The International rolling down South Industrial Blvd.


Saturday, 7 March 2020

LPG Tank Car

Before we get to the LPG tank car, here's a photo I took of a small warehouse building after the train show in Woodstock last year.  It looks to me like it would be a good subject for a not terribly difficult backdrop project.

Using the 20 foot shipping container as a rough guide, the building appears to be about 80 feet across, and 16 feet tall, plus the height of the foundation and crumbling loading dock. Looks to me that most of the siding has a bit of a blueish tone to it, and then there is the slightly more grey colour in the area surrounding the white overhead door. The personnel door to it's left blends in almost perfectly.  And that's a mailbox to the right of the large door.

Rail fanning this week along the JSSX, found this Union Tank Car built tanker as part of a train that was involved in switching operations at some of the industries along the nearby GTW tracks.

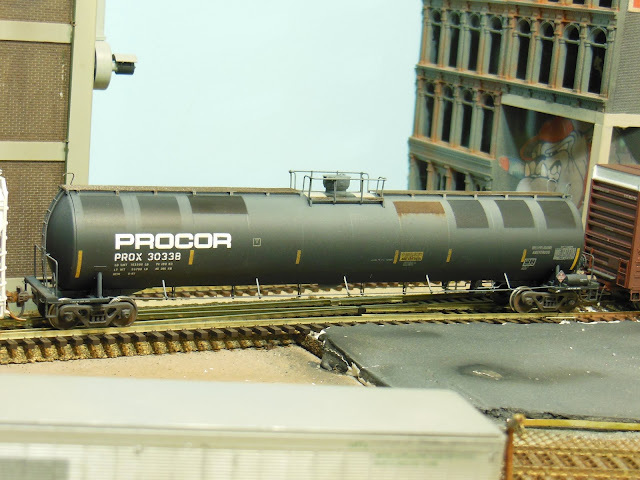
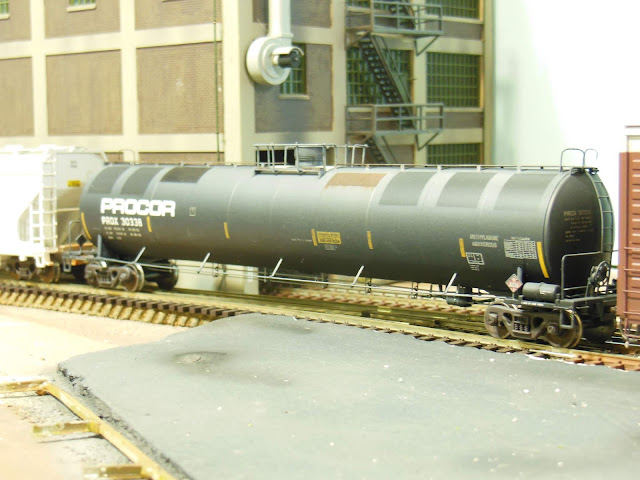
Here's the tank car on the workbench, partway through my patching and weathering efforts.

When I set this car on the layout, it consistently de-railed going around a the curve at one end, sometimes taking another car or two off the rails with it.  My other cars all go around the curve in question with no problems.  It turned out that the centre section of the trucks were hitting into those little nub things, which in this photo below can be seen just to the right of the hole for the truck screw. The trucks weren't able to rotate far enough to get around the curve.
I thought that I'd just cut those nubs off with an Xacto knife, but it turns out that they are actually metal, so that idea didn't work.  Instead, I carved away a little bit from the centre bar of each truck, allowing the trucks to rotate just a little bit more, but it's enough to allow the tank car make it around the curves with no trouble at all.

I took a spin by "C-Yard" here in Sarnia yesterday.  The yard is always chock-full of tank cars, and sure enough there was a UTC built tank car very similar to my model.  I took this picture, but as there was a snow streamer coming off the lake just then, and...well, the picture tells you what conditions were like at the time...


There's currently no place on the layout that would be either a destination or origin for a 33000 gallon LPG tank car of Methylamine Anhydrous (whatever that is, it's labelled as such on the tank), so I think that this one will not likely be seen on the rails here very often.