Continuing on with the Roberts Printing building that I showed last week, work has been proceeding nicely on the building.
The roof is made up of 2 pieces of flat styrene are moulded in a sort of not really black but more of a dark grey colour, with a little bit of texture. There are 6 or 7 roof vents to assemble, plus an elevated water tank to put together also included.
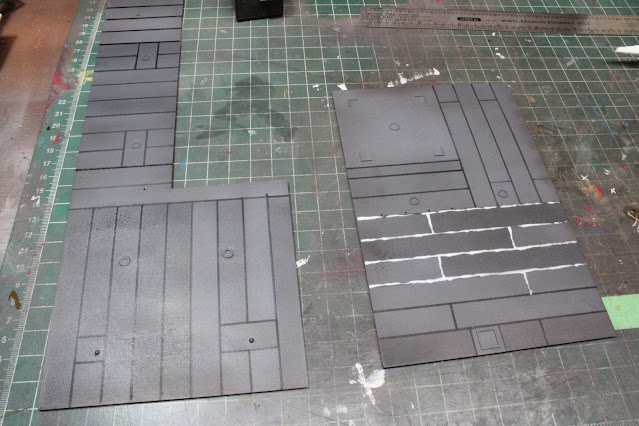
That said, the roof was going to be a little more plain looking than I think it should be, so I used a black Sharpie pen to draw tar lines on it 4 feet apart. I did 4 feet apart because I don't know how wide a roll of roofing really is, and it seemed like a reasonable guess. I then masked off different areas of the roof and sprayed them with either Grimy Black or Flat Black to create some colour variations.
With the tar lines drawn on, I then used a toothpick to run some white glue over each one. The black line can still be seen, but the white glue dries clear, so it provides just a little relief to the flat roof pieces.
because
Above are the roof sections, vent details, an air conditioning unit (from another kit), and the water tank. Ignore the colour of the water tank. I couldn't find one of the 4 pieces for the wall of tank, so I wrapped plain .020 styrene around it and then brushed a quick (and quite unattractive) coat of orangey rust over it. as sort of a primer.
I painted over the orange rust, because it looked ridiculous, with Vallejo Rust Texture, and then sprayed some vertical light brown streaks as highlights.
Closeup view of the water tank as I test-fitted the roof onto the building. It fit into place perfectly. Won't even need to use any glue at all. In the background is the kit's box cover, where you can see how the water tank was supposed to look.
Here's a look at the roof as it's all finished up now. While I had the light brown for the water tank loaded up in the airbrush, I sprayed some along the roof as well to add a bit more colour variation.
I'll have the building assembled and finished for next time.


Be careful if you spray alcohol in the area as part of ballasting or scenery, because if it hits the Sharpie marks it might cause them to run. Otherwise, that is a neat trick!
ReplyDeleteYes, I'll keep it in mind, although the Sharpie lines are pretty much sealed in by the white glue. Thanks though, appreciate it.
ReplyDelete