Anyway, checking the scrap box, I found some .010 styrene sheet and a couple of pieces of .030 round rod that I figured would be good enough. I could have used square styrene strip, but I found the round stuff first.
I cut the styrene sheet into 4' x 6' plates, and then with the back of an Xacto knife I quite gently scored along one long side, about 16 or 18 inches from the edge. I cut the styrene rod into 4 foot lengths and glued one piece down each side of each plate. Once the glue had set up, I gently bent the plate at the score line to a slight angle, being careful not to actually snap the piece. Then another piece of the round bar was glued to the underside of the plate at the bend.
A piece of wire from a twist-tie was cut to length to simulate a cable that a fork lift could use to pick up the plate. Scale size chain would have been nice to use for that, but I simply don't have any.
A half-dozen dock plates, ready for paint. The round rod at the sides are to help keep a lift truck from running off the edge. As I say, the square styrene rod bar would have been better, but I found the round stuff first and I doubt if anyone could tell it's round if I didn't tell them. Another thing that would have been nice to use is diamond-pattern tread plate, but I don't have any of that either.
6 dock plates all painted and weathered and ready for use.
Here's one of the dock plates tucked into a corner of the loading dock for whenever the next rail car arrives.
This dock plate sits ready at the end of the loading dock whenever the next truck or trailer makes a stop here.
Over to the local scrap dealer now...This DT&I gondola actually belongs to another modeler, who has asked me to weather it for him. I've had the same one (same model and exact same number) for a couple of years. The one I have was given to me by friend Brian Smith, because he knew I have a few other DT&I cars, and I was just starting to pull together my scrap metal yard at about that time.
At the time, I figured that such a shiny new gondola would look a bit out of place running into a scrap metal yard, so I had to weather it up a bit.
I started by spraying the model with grimy black to flatten the gloss right down. Then, the grimy black was removed from the lettering and stripes with some Micro-Sol and a dampened wooden toothpick. Next, I faded the yellow lettering and striping with a small brush and 3 or 4 layers of some thinned soft yellow craft paint. All of that was then sealed with a layer of DullCote.
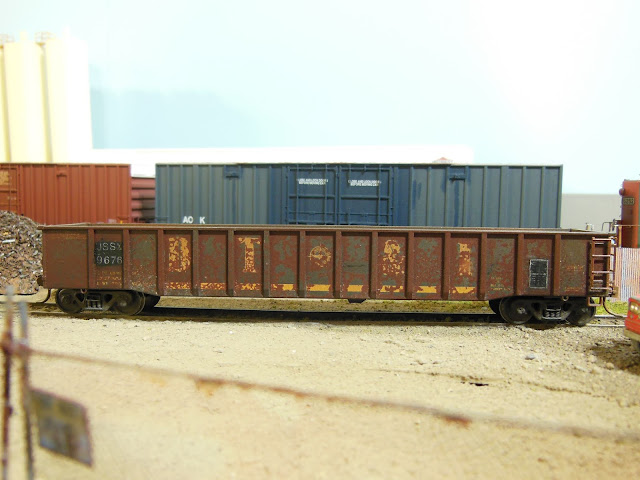
Next up was to spray the car sides with chipping fluid from AK Interactive. After that had dried (it took just a few minutes), I sprayed the car with ModelFlex Dark Tuscan Oxide. Once that colour had dried, a damp brush was then worked over each of the panels to chip some of that colour away, revealing the grimy black underneath. The result is a randomly rusty, grimy patchwork of two colours to give the impression of a gondola that's seen long-term hard service.
I patched and re-lettered the reporting marks to JSSX ownership using Microscale flat black trim film and an alphabet decal set. Final step was to spray with DullCote to seal up the whole thing.
Here's the model, the one Brian had gifted me, at the scrap yard after I've weathered and patched it over to ownership by JSSX Railway.
And the loaded gondola is ready for pick up from the scrap yard by the GTW. The metal busheling that I used for the scrap load was also given to me by Brian.


Very nice.. and cool too :)
ReplyDeleteHey, thanks Paul, much appreciated. I'm guessing you're referring to the gondola.
ReplyDeleteJim
Um, yes. Nice work + quite visually interesting. An eye-catcher.
ReplyDelete