Friday, 28 March 2025

Layout Cleaned Up & Things Are Changed Around A Bit

Well, after that dusty fallout from the renovation drywall, my cleanup of the layout is finished, done over the course of a few days.  Certainly not 8 work hour days or anything like that, but probably about 6 or 7 hours of actual working time.

The whole layout surface has been vacuumed, so it looks pretty good now, although bits of gravel and some scenery unintentionally made it's way into the vacuum.  And the buildings and structures have all been cleaned off as well.  And I also ran the CMX Track Cleaner around for a while to clean up the rails...again.

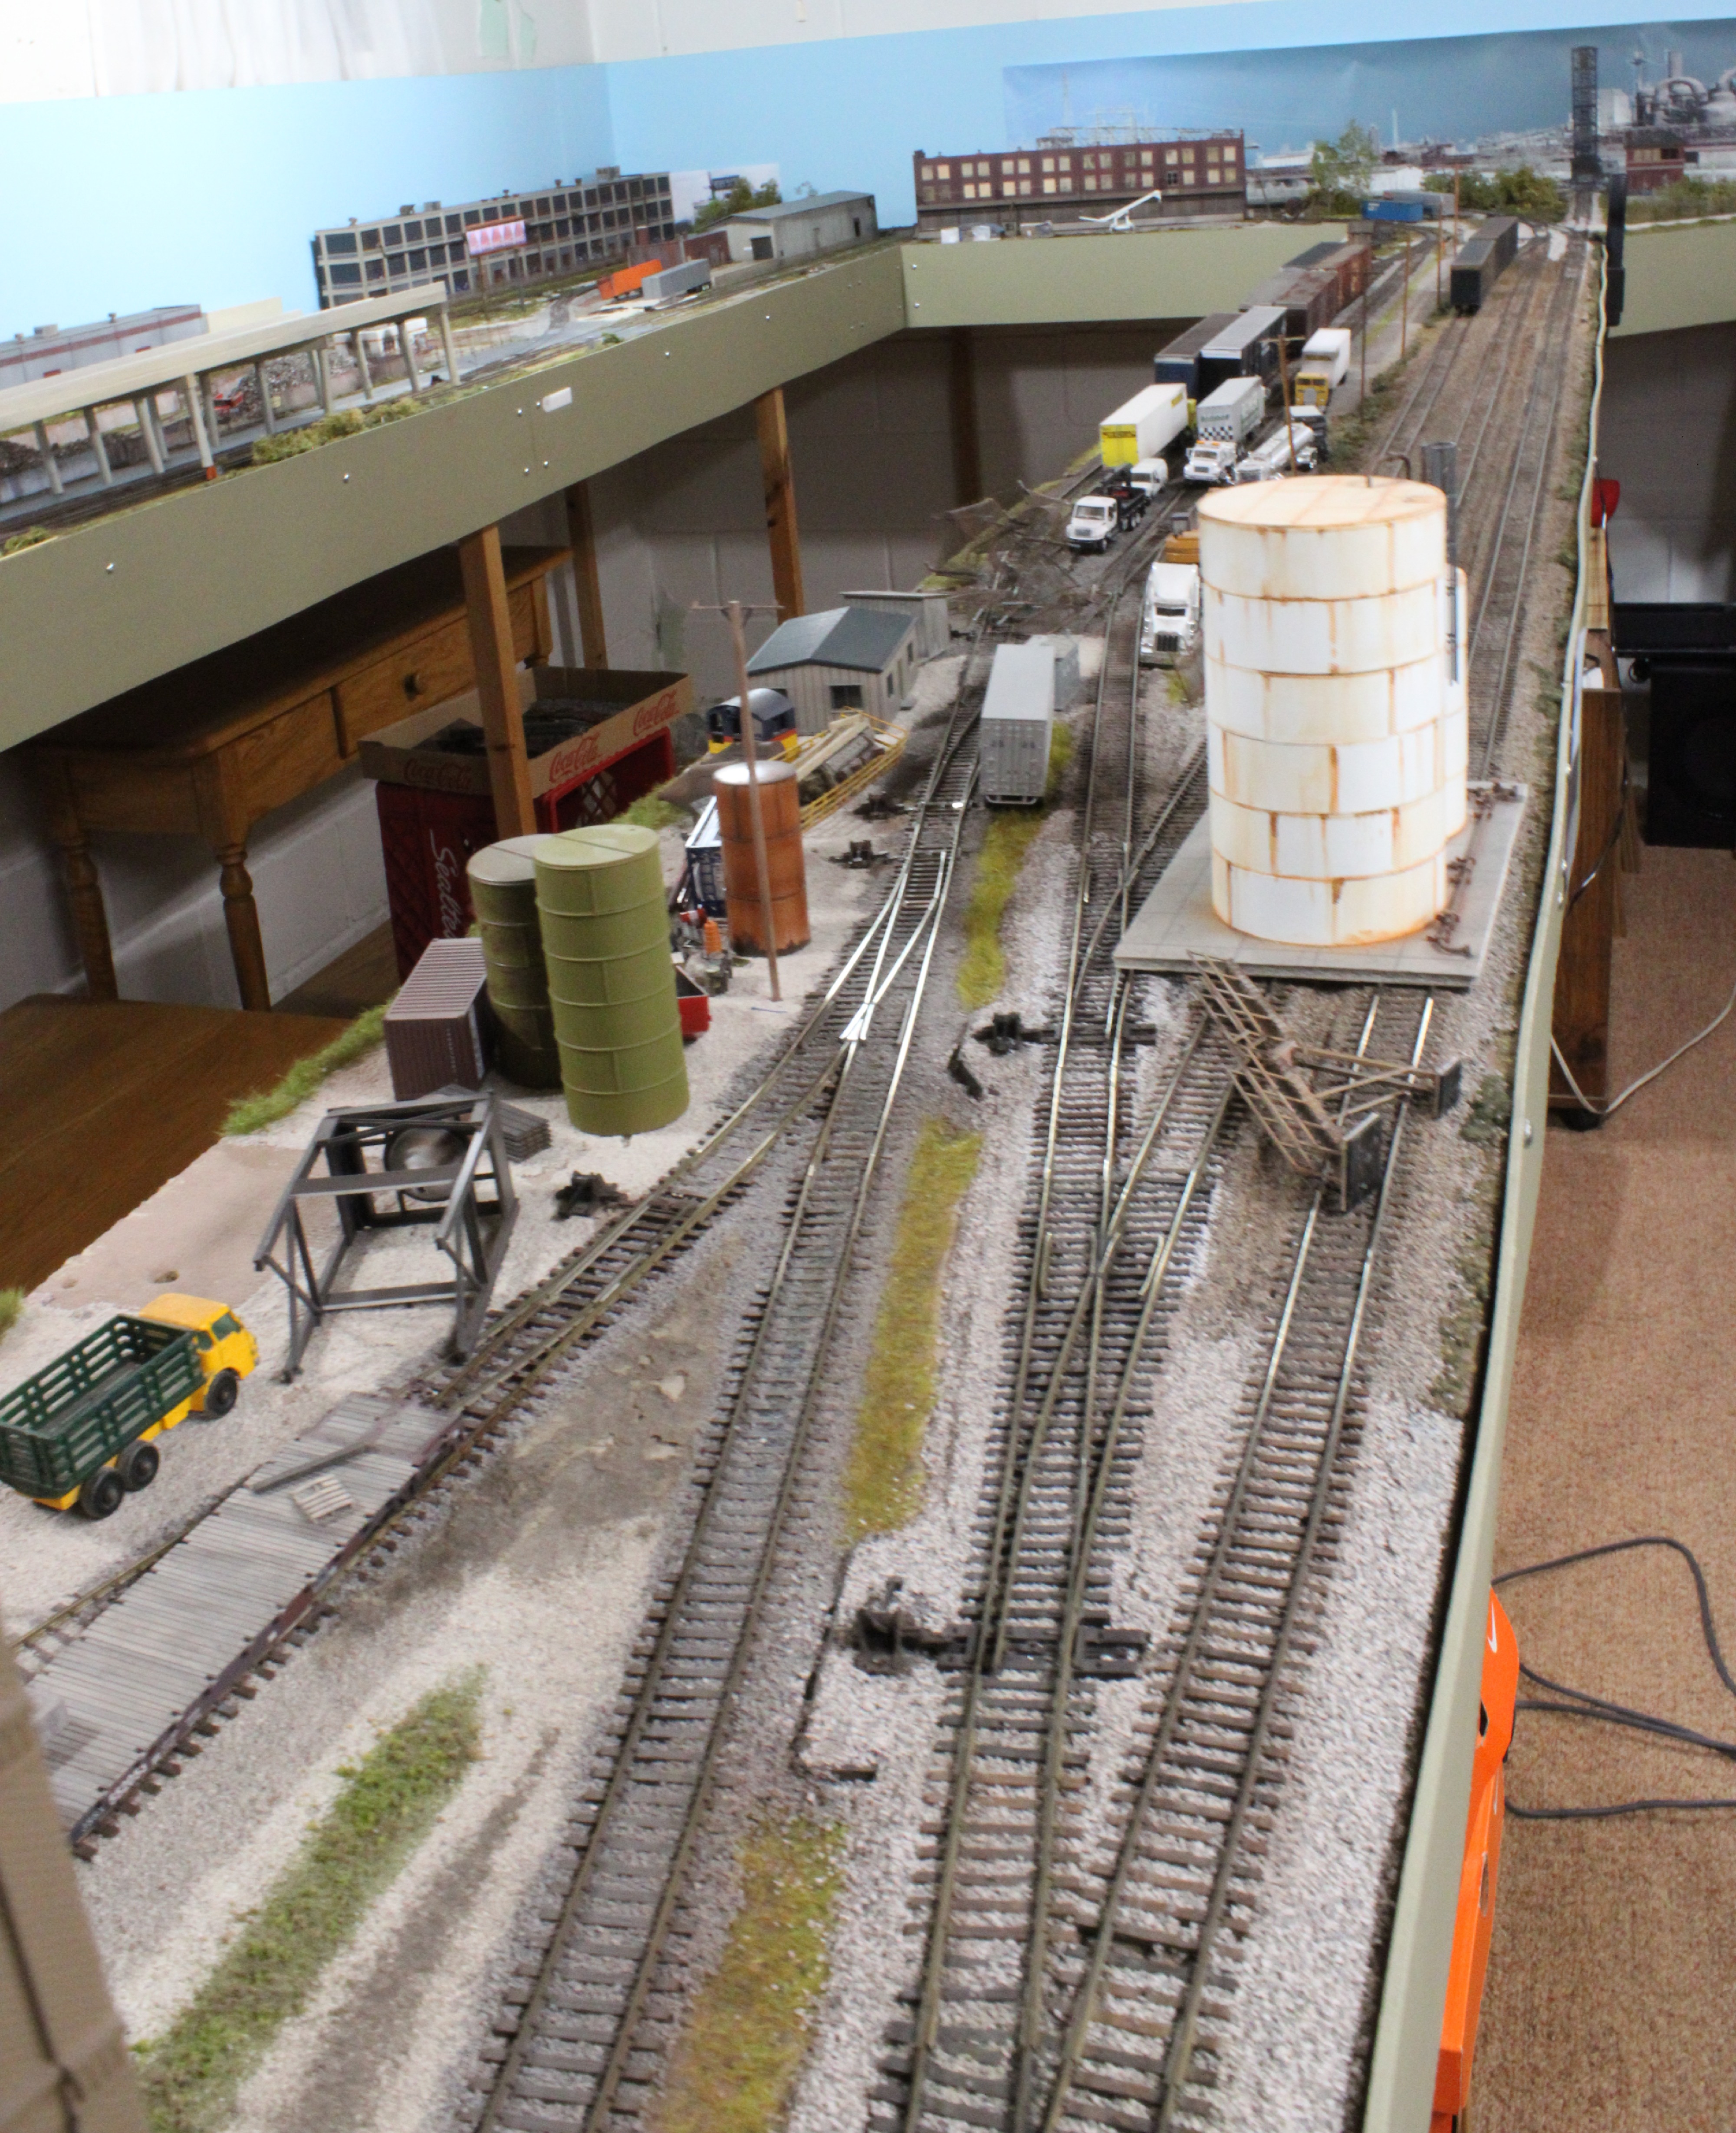
Changed a few things around on the layout while I was at it.  I changed locations of some of the industrial structures.  It's pretty easy for me to do that as 3 of the industries take up the same dimensional footprints as each other.  Mounted on the same size pieces of MDF creates kind of a "structure module", so I can just slide back the rail joiners that connect each structure module to the rail spur and then lift out the whole structure and rail spur.  Really, I could swap them around any time I wanted.  It takes me about 5 minutes to disconnect, lift out, replace and reconnect a structure module.

Here's the left end corner of the layout as it looked before with Mid-West Plastics as the industry.

And just a couple of minutes later, here's that same location with entire the industry module removed in one piece for clean-up/maintenance

And a couple minutes after that, my auto-parts plant has been moved into that location, easily dropping into place and fitting right in to the overall scene.
The parts plant had been at the other end of the layout.

And down at that other end, where the parts plant used to be, it looked like this...

...that is until I've re-located the Mid-West Plastics plant into that spot.
Swapping the locations of the two industries was quite simple, took me less than 10 minutes, and kind of gives the layout a bit of a different look without needing to acquire anything extra.

Now, with everything cleaned up and relocated, I'll just have to start getting freight cars and engines back onto the layout.

Friday, 21 March 2025

Basement Renovations are Affecting the JSSX

Doing some renovations to another part of the basement here, including new drywall in one of the other rooms.  My layout room and the space being renovated share a few feet of one wall.  And that meant...dust. More than enough of it, even with doors closed and a plastic barrier put up. I was hoping it wouldn't be too bad, but I was wrong. 

So, with pretty much every thing and every inch on the entire layout receiving at least a light coating of grey drywall dust, that meant plenty of cleaning and vacuuming and moving stuff around. I took a moment or two to grab some photos, so here's a sampling.

Next to the layout room, the walls in this room had been covered in wood paneling from the 1960's, so this is new studs and insulation and the drywall stacked on the floor.

Sorry for the blurriness, but with new wiring going in the lighting was non-existent for a few days.

So a couple of views from the workbench and layout areaFreight cars and engines to be brushed off and vacuumed are stacked up on the workbench


A whole bunch of accessories and detail bits from all over the layout to be cleaned off after the freight cars and engines are done.

Peter Mumby passed away on Thursday, the 20th of March.  First day of Spring.  I met and was fortunate enough to get a little bit acquainted with Peter through many train shows. I remember that it was him that bought one of the first freight cars I'd ever weathered, a blue Pillsbury covered hopper.  I was quite pleased that it was Peter that thought it was done well enough to buy.
Here's Peter and I when he and George Dutka visited me and the JSSX almost 6 years ago.  Such a nice guy. Condolences to Peter's family and friends.

Friday, 14 March 2025

Corrected a Years-Old Mistake

 So, I posted this picture (below) on the facebook group "Proto-Freelance Model Railroading" just over a week ago.  It's a new group for me and it was the first post I've put up on there.

The facebook posting has had well over 1000 views so far, and a bunch of comments left as well. I imagine that you have probably seen my pictures of my JSSX 813 before on the blog here, as I know I've shown lots and lots of them. It is my favourite engine, and I've always been really pleased with it.  

Everyone that's seen in person on the layout has noticed it and no one has ever said anything critical about it.  Until now.It only took one of the facebook comments to kind of bring me down a notch.

Here's that facebook comment from Rg Hough... "I have to ask, is that fuel tank on backwards?"

And then Doug Stark explained that "where there is a single fuel fill, it tends to be at the front. Air tank on EMD second+ generation typically offset to the rear of the tank/unit".

What?!!!

It's been this way ever since I painted the engine several years ago.  I didn't realize it was wrong, and no one ever mentioned this before.  It's really an easy enough thing to fix.  The fuel tank is just friction-fitted, and slips right off with a gentle pull.  No screws to remove or anything.

So now I'm thinking should I go back through my pictures of 813, re-do them, and delete the ones with the fuel tank backwards.  I'll maybe re-do some of them.
Here's that facebook post picture, re-staged and done over with the fuel tank corrected.

And since the backwards fuel tank was visible in the blog header photo, here it is staged and re-taken.
Well, the picture is almost the same

Also, I purchased this Atlas model from Sean, and received it last week.Atlas GE Dash 8 40-B, it should eventually look good with JSSX 5068 (below)


Same Dash 8 40-B model, different number which I repainted some time ago

That'll wrap things up for now.  Have a great week.

Friday, 7 March 2025

I've Been Cleaning Dirty Track

I was noticing a little trouble with one of my engines here hesitating a little bit in a couple of places on the railroad.  So, time to clean some wheels and then to break out the track cleaner car.  It's been a few weeks since the last time I did this.

Wheels first, I tear off a piece of paper towel, lay it on the track and dampen it with 91% isopropyl alcohol, and run the locomotive wheels over it in both directions.

There's the paper towel afterward with the marks from the wheels carbon tracks easily visible

Next up is my all-brass CMX Track Cleaner car that I've had for several years now.  I'm not sure now what I paid for this car, but I know it was well over 100 USD, and I'm quite sure the prices have gone up since.My CMX track cleaning car along with a roll of the cleaning pad


Just have to cut off a piece of the cleaning pad, and clamp it beneath the cleaning car.  Load some of the alcohol into the tank car and let a slow drip of the alcohol moisten the cleaning pad.

Of course it's a simple thing to run the CMX car a a few laps around the layout behind an engine 
There's my CMX car coming around the curve behind 5931

So, I actually went through the procedure a couple of times that night, and here's how the cleaning pad s look afterward
So, the results are in, and yes, the rails were indeed dirty.

I got the CMX car and get the roll of cleaning pad from Tony's Trains Exchange in Essex Junction, Vermont.  Here's a link to the website in case you're interested:  https://tonystrains.com/

In case you've missed it, Athearn has announced their new CarKnocker Line of freight car models.  Looks like it kicks off with RailGon and CSX gondola models that feature a swayed back, some with faded lettering,  as well as a pair of data only models. They're looking for pre-orders, so who knows when the cars might actually become available.  

Here's the link to the Athearn video announcing their new "Carknocker" line of models: Athearn CarKnocker Line   Be advised that the video is pretty boring narration only until the 1:14 mark when they show images of those various gondola models.

And sending thoughts and best wishes out to our friend Peter.