Saturday 28 November 2020

More B36-7

Here we have Brian Smiths B36-7 again, in this view it`s sitting out on the JSSX shop track. You can tell that it`s been finished it up because the green tape is removed from the windows. For me, that`s the final step in the process.

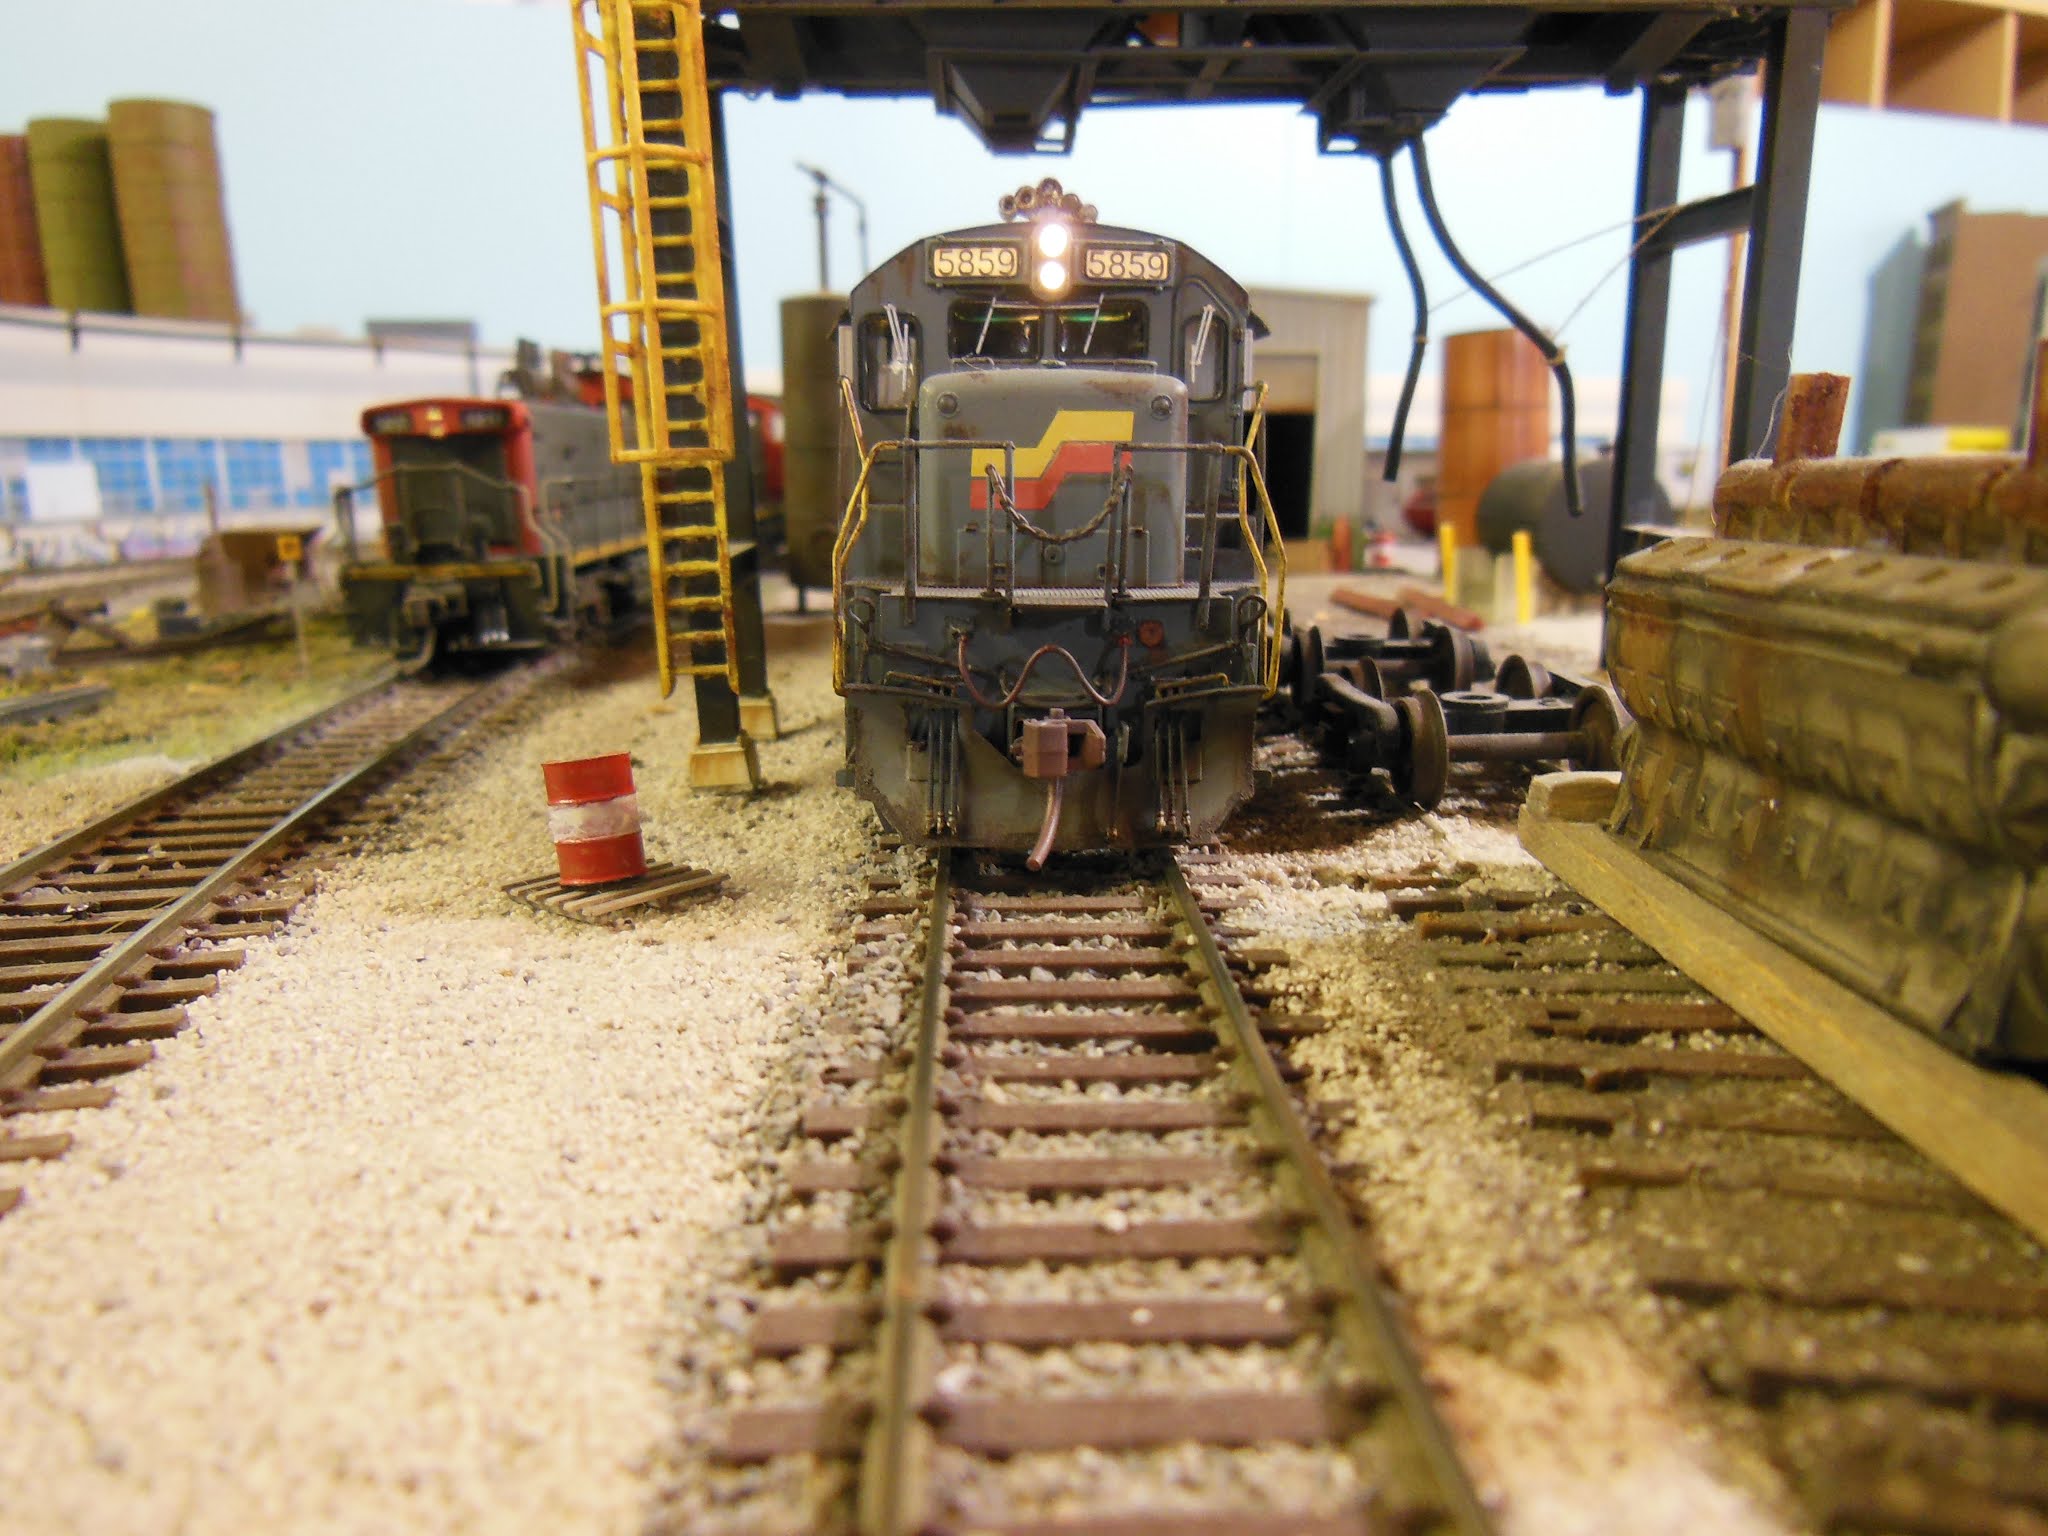
Luc saw this locomotive here yesterday, and had a good idea for it as well.  He suggested putting CSXT lettering beneath the numbers on the cab, as that was what was on the prototype at one time.  A real good idea, but if I did that, I would likely only be putting that lettering on the engineer`s side. And I would then put a strike-through line through the letters to help show it doesn`t belong to CSXT any more.   So it would appear something like this: CSXT

But, the problem with all that right now is that I don`t have any white letter `X`s remaining on my decal sheets. Microscale only puts 3 `X`s on a lettering sheet, and those tend to get used up pretty quick around here.

Anyway, here are a few looks at the engine as it is...

BSTX stencil font lettering at the bottom of the battery box door.

This side has the BSTX located on the cab, directly below the numbers.
A bit shadowy here, but I have darkened in the grilles at the rear of the locomotive by using thinned black oil paint.  Rust streaks are burnt umber.

A look from behind the locomotive. Some rusting can be seen here at the bottom edge of the hood. That rust continues basically around nearly the entire locomotive.  The deck plates are stained from rust as well (dark AK Interactive wash was used to do that).

And changing gears somewhat, I`ve weathered this BNSF boxcar a bit for Jamie Barron. Trying my hand at HO scale graffiti, this is hand painted.
The tagger has covered part of the reporting number, so they have been patched over using microscale stenciled decal numbers.

Saturday 21 November 2020

Any Guesses?

 Any guesses what's underneath the tape and paper towel?

Fading down the yellow sill stripe is the first step as I began the weathering of Brian Smith's B36-7, made by Rapido.

Here's how the Rapido model looked when it was taken out of the box.
A extremely nice model, and it runs very well too, as I "had to" take it out for a spin around the layout.  Brian wants it to be pretty heavily weathered, and re-lettered for his leasing company "BSTX".

There's that sill stripe after the yellow has been faded down.  And I've blanked out the "Seaboard System" lettering as well.  I sprayed weathered black over black trim film and cut it out that to the shape to place over the lettering.  I haven't yet decided on which letter font to use for this BSTX leaser, but I think a stencil font would be a good choice.

I thought I'd paint over one door on the engineer side, so I masked it off and sprayed it with the weathered black as well.

This is about as far along as I've gotten with Brian's locomotive so far.  There's still the roof weathering to go, the lettering to do, flat/dull coat sealing to do as well. I should have more on this for next time.

And for anyone interested in weathering locomotives, you might find this YouTube video helpful. Shot from a drone at the NRE facility in Silvis, Illinois, this was just recently posted onto YouTube on Nov. 8, 2020.  I stumbled across it this week.  It's 14 minutes long.  Sorry about the advertisements, but there's really not much I can do about that. https://www.youtube.com/watch?v=mh0342ngV7o 


Saturday 14 November 2020

Patched RailGons

 A few weeks ago, Jamie brought another group of freight cars over for me to weather.  I thought I`d show the pair of Railgons that he left with me. These are, I believe, older Roundhouse models.

I started off by brush painting the original black insides of the gons with 3 coats of Vallejo`s Rust Texture. I tried to make sure to use vertical strokes on the inside walls, and then painted the floor of the gondolas with long brush strokes, doing my best to not leave brush marks. With that all dry, I feathered in light layers of different shades of brown so as to not leave the entire interiors all one colour.

I thought I`d show Jamie`s two cars being spotted into the scrap metal recycler on my layout.

I cut out a few graffiti decals and put them on just one side of each car. After the decals were applied I went over the car sides with a few thinned coats of Espresso (dark brown) craft paint, again sticking to vertical strokes only.  Doing this flattened down the colours of the graffiti, and does wonders to age the shiny black original paint.

As I was working on the gondolas, it occurred to me that maybe I should change the reporting marks as well in order to represent gondolas that have been sold and patched to a new owner.  I made a quick phone call to Jamie, and he suggested patching both cars to CSXT reporting marks.


Looking closely, you can see the vertical lines left by my paint brush on the inside wall of the gondola. I was careful to do this on purpose, to try to simulate vertical rust streaking. Although hardly visible, it looks a great deal more prototypical than if any visible brush marks had been horizontal.


In other news, I met up with George Dutka (of the White River Division blog), Don Janes, and Luc Sabourin at the Sarnia train station platform last Monday.  George had the idea and set it up. Peter Mumby and Brian Smith weren't able to make it, understandable as it is about a 60 mile drive for them and George as well.  The four of us all had a great visit though, and we each brought some along models to share too. I didn't take any pictures, but George did, and he posted some of them to his blog, so please click on the link below to see that post.


Saturday 7 November 2020

BRAR 10009

Here's a look at a really nice weathered 50 foot boxcar that belongs to Luc Sabourin. I'm sorry, I forget who he said did the weathering for him, but that weathering artist did a super job on it.

I was asked to simply patch over the boxcar reporting marks and number for Luc's Brownville and Ashland Railway.  Luc wants his models to be very prototypical, and was quite specific about how he wanted the patching done, and even provided the decals for me to use.

I really should have taken a picture before I did the patching. This boxcar gets even a little bit better looking in the next photo.

After the patching was done, Luc also asked me to update the boxcar a little bit more, by adding the FRA reflective yellow stripes from Smokebox Graphics.  He even very helpfully provided a photo of another prototypical boxcar that he liked to show me exactly where he wanted the stripes to go. 
If you look closely enough, you can see above the trucks a small red decal that I applied at Luc's request.  That decal denotes something to do with inspection of the wheels/trucks.  Sorry for the blurry photo here...my fault...but what a great looking model !