When I use my airbrush, I almost always spray ModelFlex acrylic type paints. I don't have a spray booth, and there's no fumes from the acrylic paint. I was wanting to re-build one of my layout buildings and it's going to need repainting as part of the project, but I didn't have enough of one colour - Concrete Gray - for it.
I looked up on the website of the supplier here in Canada that I've used in the past, but they had that item listed as out-of-stock. I sent off an email to them, explained what I wanted, and that I would also order some other items at the same time. I received an email right back saying that they didn't know if they were going to re-stock ModelFlex. Not what I wanted to hear at all.
So, back to the internet and found a place in New Jersey that had what I wanted. It would cost me more and of course delivery takes longer from the US to Canada. But at least I could get what I was after, so I placed my order at www.megahobby.com . Check them out. They shipped the very next day, which was just about the same time that I remembered that Canada Post is striking. And then on the news, they said that Canada Post is asking the USA and other foreign nations to stop sending parcels to Canada because the backlog of packages awaiting delivery is so great.
If it isn't one thing, it's another...
The structure that I want to re-build is made up of parts from Walther's Roberts Printing kits, and will be used to make this building, which I've featured before, even longer.
I often receive comments (positive ones) about this building from anyone that sees it, and the frequently asked question is "how did you do the broken windows?". The answer is white glue. Since I'll be making and breaking some more, here's a photo below that I hope will help illustrate the process. The process is fairly time consuming, but I just do a bit at a time so it doesn't seem so bad. The individual panes are filled in with white glue that has been allowed to set up for a few minutes and then brushed in with a small, flat artist brush.
You can see the windows on the parts sprue that haven't been touched. In the middle-right are 3 small windows that have been filled with white glue which is still wet. Above them are 4 larger windows in which the glue has dried overnight. And to the left of those are 3 that when installed into the building will appear to have been smashed out by groups of rock throwing vandals. Technically it will have been me doing the smashing by use of my Xacto knife, and no vandalism charges will have been laid.
Here's how the structure is looking at the moment. It'll get better. The overall length of the whole building is just over 44 inches.
Down at the Sarnia freight yard, this nice looking blue and white GATX GP38 has been working for a couple of weeks or so. GP38's are favourites of mine and so are leaser engines, so for me this is a real nice combination I'll try to get a better picture of it and post another time. The little black thing at the corner of the station is a rat trap. Anybody ever model one of those as a detail on a layout?
With development of the new oil storage industry for the layout proceeding, I remembered this unassembled Walthers kit that had been waiting in my storage cabinet for years. And by years, I mean it's been at least 20 years since I bought it. Anyway, I finally dug the kit out of the cabinet and spent part of an afternoon putting it together. It's really an LPG car, so maybe not correct for use here, but I don't have many tank cars, so I'll use it at least as a placeholder for the time being.

For the most part, the kit went together well enough, but the railings and stanchions around the loading hatch weren't easy. The car came with plastic wheels, after all it is 20 years or more old, which I changed over to metal ones. To simulate re-painted areas, I masked off a couple of places on the body of the tank and then gave whole thing a couple of light over-sprays with flat black. I should see about getting a set of the newer style DOT decals though for my tank car fleet to bring them up to a more present-day appearance.
Here's my "new" tank car spotted at the storage tanks, coincidentally along with another Walthers tank car of the same type and era. I would have liked this industry to have been able to take in up to 3 cars at a time, but the real estate available limits it to only 2 available car spots. Oh well.
Back on October 27th, a misty rainy day, "C Yard" here in Sarnia happened to be significantly less full than usual, which made available this rare look at these storage and scale sheds. They are located out in the middle of the yard, and I'd pretty well bet that it's been 10 years since the last time I saw them, as multiple tracks of tank cars and pellet hoppers are always blocking the view from the station platform. A couple of simple structures like these would make for interesting additions to a layout's freight yard.
And I was asked to heavily weather a pair of 2-bay covered hoppers for cement service, so here's one before and then both of them after.
I know the one car is derailed, but I did that on purpose because they kept rolling away before I could get the picture snapped.
Well, on the JSSX this week, a little bit was accomplished.
I got some fencing made to surround the property where the oil storage tanks are located.
Here's a picture of the fence jig that Brian Smith made for me. I gave Brian the dimensions I'd been using for the height of the fences (6 ft.) and the distance spacing between the vertical posts and he whipped this up. There's two long horizontal grooves cut into the board and then holes and vertical grooves are evenly spaced 10 scale feet apart. The holes allow for soldering or gluing the posts and chords together.
There is a short section of partly completed fence in the top left of the board and on the right there are 3 gates that I just made by eye. One is for the rail entrance and the other two are for the truck entrance.
On the JSSX, here's a "drone view" of the entrances to the storage tank property, with the fence and gates installed. Looks good so far. Next up was to start work at the grade crossing to the truck entrance over that curved track switch. I'll trim and fit .010 thick styrene sheet between the rails for that. The .010 thickness will sit low enough that it won't interfere with the wheel flanges to cause derailments.
To fill in the area between the two sets of tracks I decided, rightly or wrongly, to use wall spackling rather than try to cut and trim styrene there. I masked the rails, especially that curved switch beforehand. I let the spackle dry overnight and then skimmed a 2nd coat over top the next day. Some very light sanding followed.
In much the same photo below, that's the .010 styrene in between the rails of the switch, sprayed with Rustoleum grey and Modelflex grey. Added in a Caboose Industries ground throw - it's an N-scale one which I think looks better - that I painted with Vallejo Rust Texture paint to get rid of the shine of the Delrin plastic.
Just have to fill in the area of the switch points - I'll use more .010 styrene for that - and then some thicker styrene where those long ties are at the switch rod too.

In the 1:1 world, on Friday the season's first snowfall also brought this UP SD90 8510 and SD70 4223 that were turned at the wye. They're seen here rolling past the station on the way back to their departure track at the east end of Sarnia. Kind of rare to see these around here.
And to finish out the week with something a little different, when out railfanning I guess it can pay to look up every once in a while too...
Here's a picture I took on October 24/18 of a pair of storage tanks at the Imperial Oil site along Christina Street here in Sarnia. Imperial has been tearing down part of their operation this year. I went by there again on Thursday, and the tank on the left is gone. I suspect the other tank won't be far behind.
I like the fencing too. Maybe some white plastic from a shopping bag and some scale lumber on some fencing around the tanks on the layout would give the look of this.
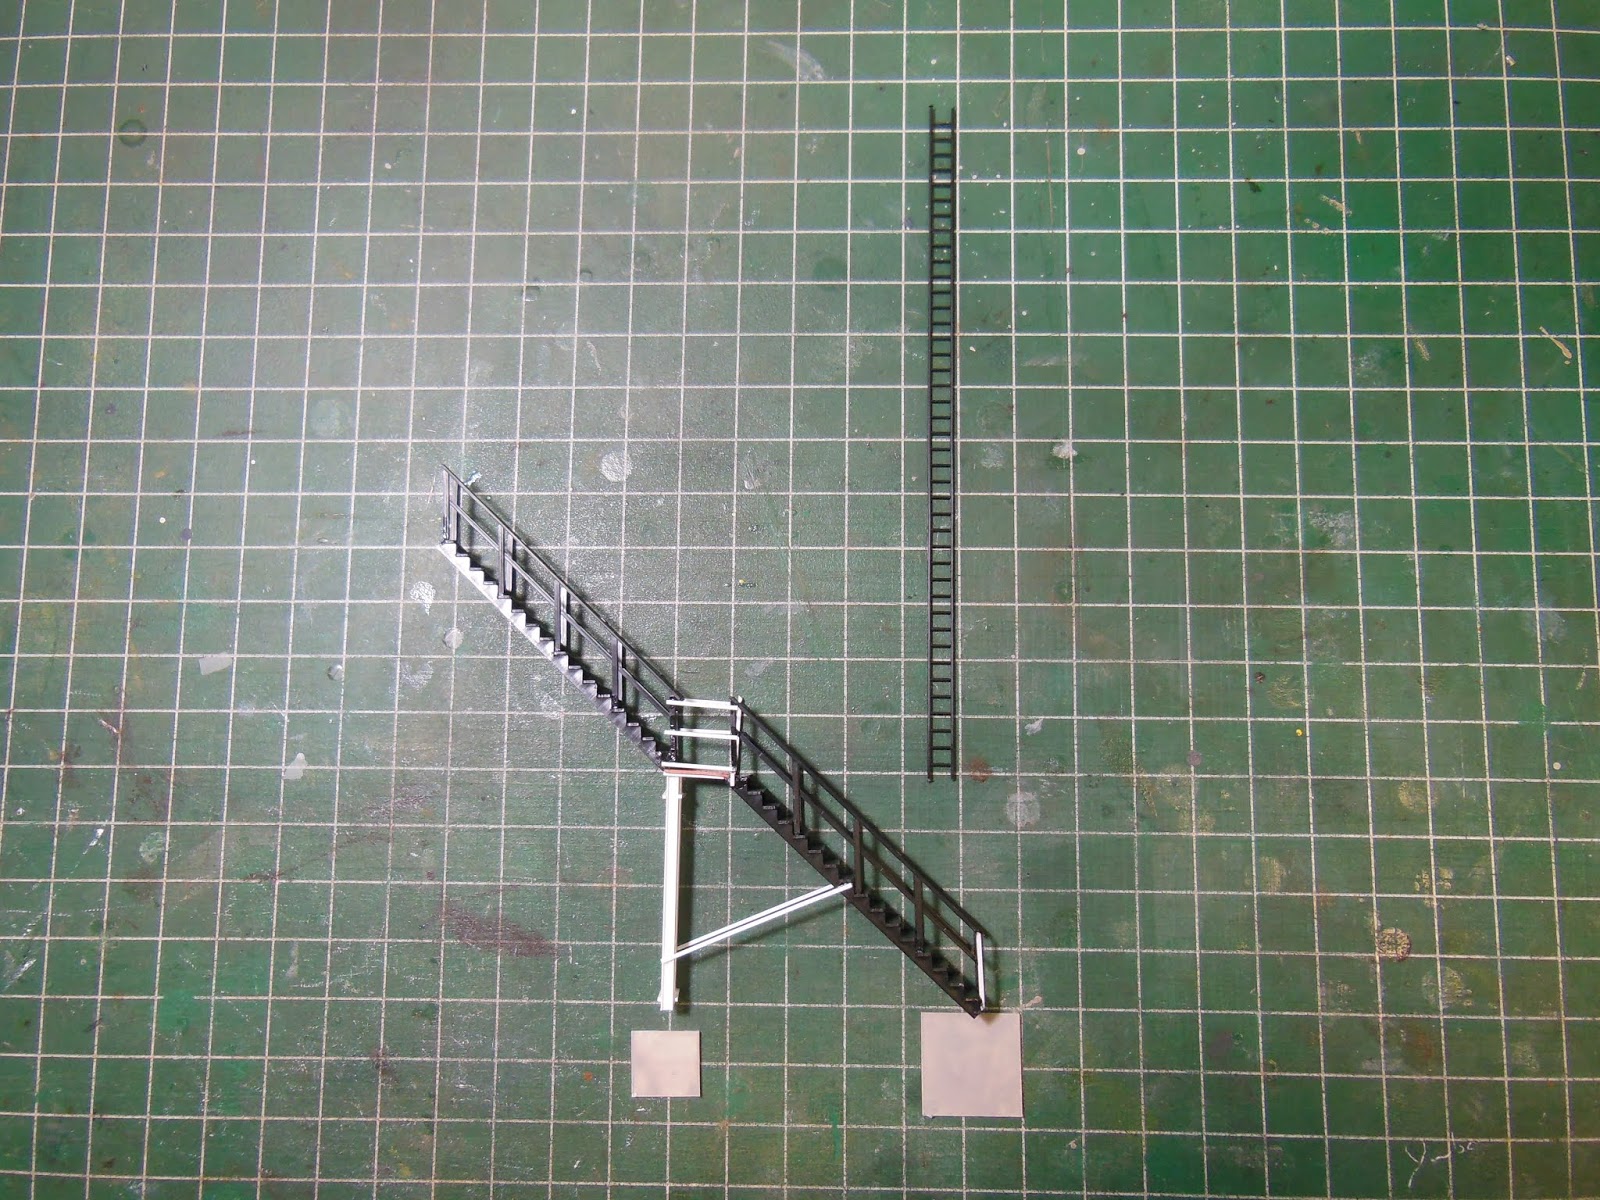
I put together this access stairway, which I rusted with Vallejo Rust Texture, up to the one tank. The stairs and ladder are Central Valley parts, but the white support and railing sections are scratched from a bit of Evergreen styrene.
I think my storage tanks were Rix kits. I took them outside to spray them with Rustoleum Flat White, which I followed with weathering with burnt sienna oil colours. Once that had dried for a couple of days, I added some Vallejo Rust wash. The stairs were primed and then painted with Vallejo Rust Texture. Here's the tanks set up on a concrete pad (foam board) on the workbench.
With piping added, and everything set in place on the layout. I'll have to figure out how to make some curved safety railing for the tops of the tanks, and make fencing to go around the area too.
Over in the 1:1 world, my neighbor Ian Cryer, sent me this nice photo that he took of Lake State Railway's MP15 #1502 as it switched the Dunn Paper plant in Port Huron, Mi. To my eye, this blue and silver scheme with the white pin stripe is really sharp looking. The white chevrons on the ends don't hurt the appearance of the locomotive either. Thanks Ian!
Until this past summer, switching in Port Huron was done by GT/CN. My friend Luc Sabourin sent me these next two photos of LSR 1502, also in Port Huron, the week that LRS took over operations. These were taken outside the Domtar Paper plant. Thanks Luc!