Saturday 26 October 2019

Woodstock Show Finds, and Work for the Track Crew

The first train show of the season was in Woodstock, Ontario this past Sunday, and I always look forward to it.  There is usually another one in Woodstock in January and again in April, but weather can be a problem for traveling then, so this is the one that I try to make sure to attend.  I only went as a customer this time, and of course I forgot to take my camera. But I can show you what I purchased though.
I've got vague plans for the 86 foot 8 door boxcar, the Branchline WC boxcar was a nice find, as was the Reimer tractor-trailer.  The NWSL Chopper will be useful for future projects. The one hobby shop here in Sarnia closed down at the end of September, so I picked up the Xacto blades and Microbrushes, and the couplers and Flat Haze will go into my supplies.

I started to do a little bit of switching on the JSSX on Thursday, but I didn't actually get any done as I ran into a bit of a problem when the train arrived inside the gate at Wright Bridge & Tank.
The view from just outside the gate to Wright Bridge and Tank.  Wright was my mother's family name, so I chose to use it here.

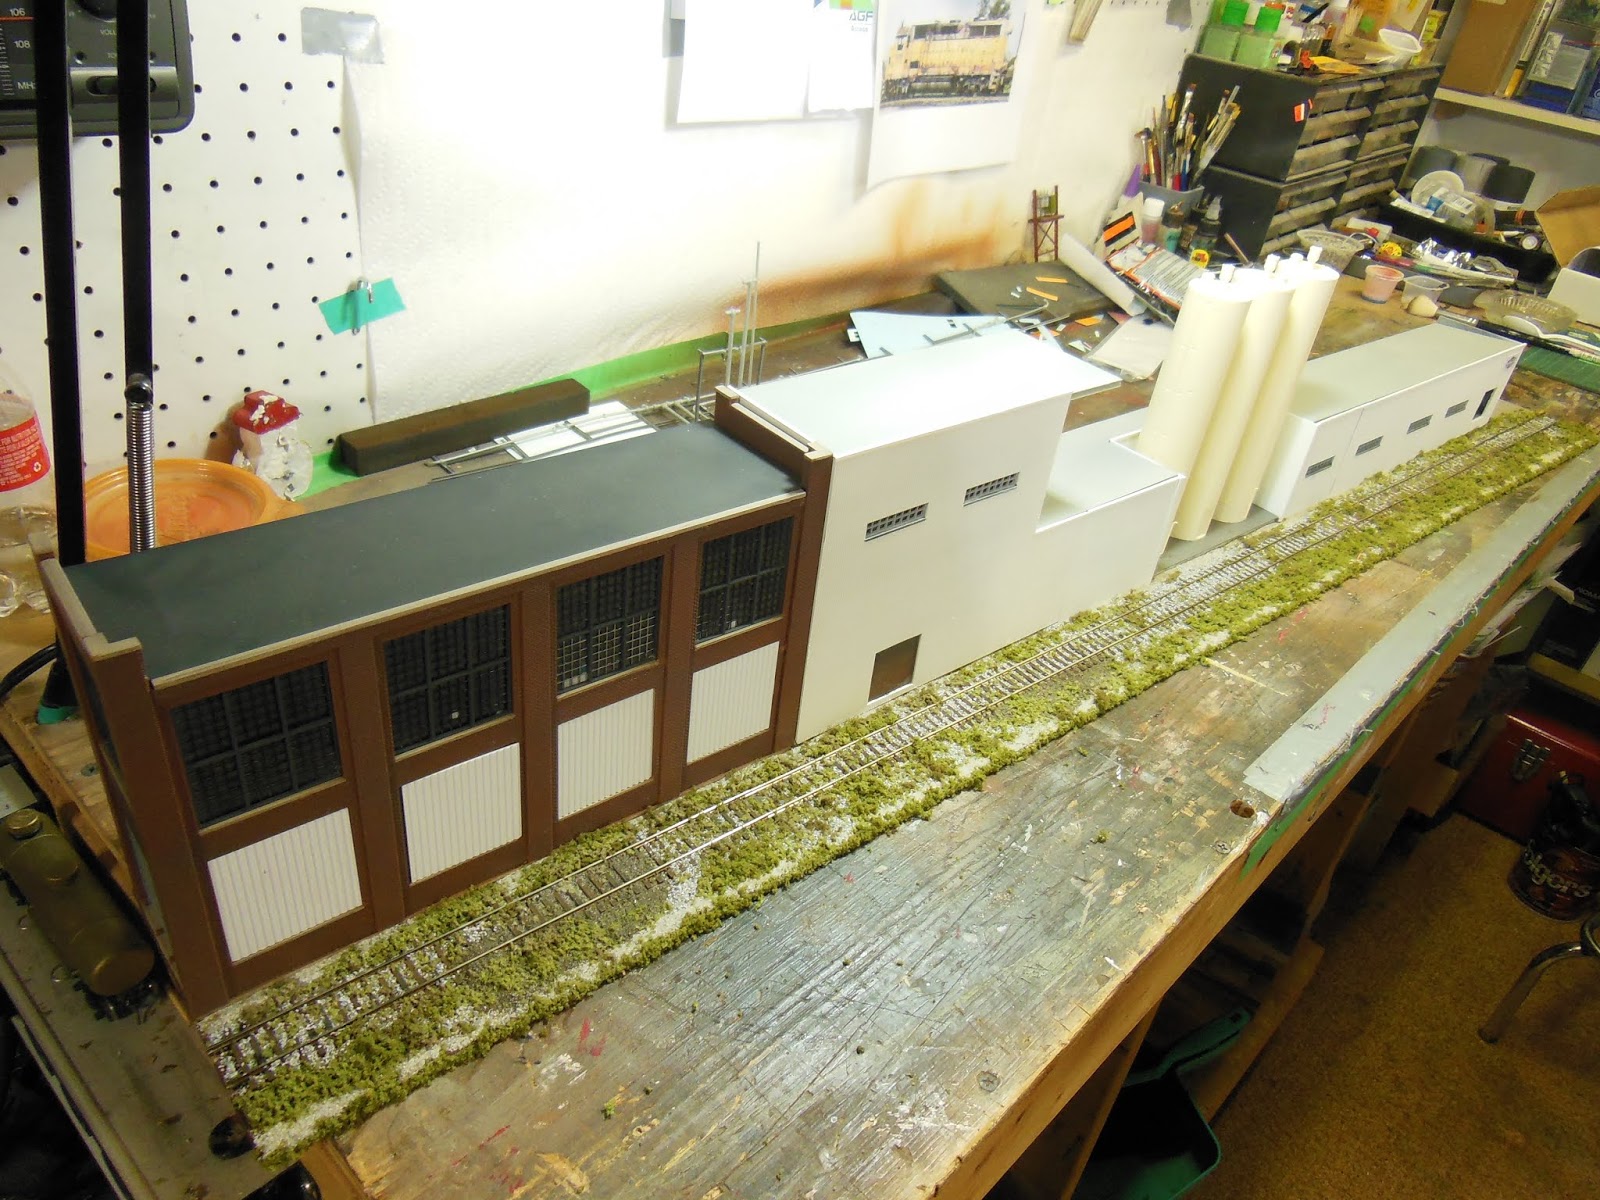
A little bit nicer view of the Wright fab shop.

And here is the problem, of course.  There's been trouble here in the past, with gondolas and flat cars derailing on their way out of the facility, but the reason certainly was never this obvious.

The broken Atlas switch will be replaced with this Peco model that I fortunately happen to have on hand. Although the Peco switch is not exactly the same dimensionally, it will be an upgrade, so the layout will be better off for it. I guess the track crew (me) will be spending some time working here this week.

Saturday 19 October 2019

Some Layout Work From This Week

Took time away from my SCLAIR covered hopper and other weathering projects to do a bit of actual work on the layout that I'd been putting off for a while. I've been wanting to move the Midwest Plastic industry a bit further along, but doing so was going to mean re-arranging a bit of track work. And this week I finally forced myself to do it.  Took a little over 3 hours to get everything in place and at least operational. The only real complication was that I had to move an electrical feeder as well.
Above, these two switches and the diamond had been located about 6 feet to the right.  I moved them this week so that the switch on the left will become the lead to the Midwest Plastics spur. I did this so that the lead will be in the same direction as the one to my Parts Plant, which is next to it.  The switch on the right will lead to an industry to be named later.

Anyway, here's the Midwest Plastics industry (two separate buildings, plus the silos are separate as well), sitting on my workbench (again), this time to be permanently set onto a piece of MDF so that I can move it to and from the layout easily to work on it.


The buildings have been epoxied down onto the MDF, and the spur is complete with ballast and weeds.

 And here is Midwest Plastics in place and at least operational on the layout.

Oh, and speaking of that parts plant, I'd like to come up with a name for it sometime, so if you've got any ideas...that's it in the background of the photo below.


Saturday 12 October 2019

SCLAIR Covered Hoppers Part 2

Spent most of my model railroading time working on the 3rd SCLAIR covered hopper that I showed in it's kit form here last week.  It's not finished yet, but is painted and just about fully assembled and ready for decals.

I'm leaving the bottom stirrup steps for last, as I'd probably break them off if I put them on before the decals.  Also, I have some etched brass stirrups on order from Yarmouth Model Works, so those might be a good option as well.

I've kitbashed model buildings previously, and detailed and re-painted freight cars and locomotives, but I don't actually have any experience at all at putting freight cars together from kits like this. Never done it before.
I showed this view of the Intermountain kit last week.

I went with my best guess for the colour, which is acrylic Reefer Orange with Reefer White for the diagonal stripe. As I began spraying it, the orange looked like it was coming out really bright as I sprayed it over the light coloured plastic that the kit is molded in. To try to counter this, I gave the parts 3 or 4 passes of Grimy Black as a base, and then sprayed the Reefer Orange over top of that.

I think the results are acceptable, but the orange is not as dark as whatever shade of orange Intermountain used on their decorated models.


Here is the covered hopper masked and ready for the white stripe.


Masking removed it looks pretty good. A slight leak of white at the top right corner of the stripe was easily fixed with a Q-Tip dampened with Micro-Sol.  Happily none of the orange painted lifted off when the masking tape was removed, so that's a win.


No weights were included with the kit, and I don't have any of those sticky lead weights, so I epoxied 1/4 inch steel hex nuts from the hardware store into the hopper bays.

My soon-to-be NCLX 46551 posed with the other two survivors in this paint scheme.  The colour is  definitely lighter, but certainly close enough for me.

And finally, perhaps saving the best for last this week, I watched as this eye catching bit of graffiti passed by on Monday...

Monday 7 October 2019

SCLAIR Covered Hoppers

I've had one of the Intermountain orange and white SCLAIR covered pellet hoppers for the layout for quite a long time, and had thought that a set of two or three of them would be real nice. When Intermountain released them again last year, I got another one, plus an undecorated kit of the same car so I could use a matching set of Highball Graphics decals that I have.

The orange and white colour scheme is really a nice one, and stands out nicely among the black tank cars and grey covered hoppers that always fill the freight yard here.

I was told a while ago by a friend that there are only 3 of the orange and white SCLAIR three-bay covered hoppers remaining.  They have all had their reporting marks changed to NCLX, and the numbers are 46044, 46048, and 46051.

Actually the Intermountain models aren't really exactly correct (it figures), but they're close enough for me. The main difference that I can see is the 3 horizontal stiffeners that run along the top of the sides on the prototype, whereas the Intermountain model has only one, which is located a bit lower down on the side panels. Oh well, I don't really think I could properly correct such details, and I'm content to live with such a compromise anyway.
My newer Intermountain model, as it appears straight out of the box.

My first SCLAIR hopper, on which I have previously done some paint fading and a bit of rust streaking.

The undecorated Intermountain kit, along with the Highball Graphics decal set.  Metal walkways for the roof come with the kit, but no weights are included.


Here are two photos of the prototype SCLAIR hoppers in service, both of these having been taken by Luc Sabourin.
This car has the French "Polyethylene" painted out below the SCLAIR.


Note that this one (46548) has the word "Polyethylene" painted out in both locations.


Here's a photo that I took a couple of years ago of the 3rd one of the remaining prototype cars, NCLX 46551. This one was taken as the freight car was sitting in the yard at Sarnia.

So, I'll be trying to patch and re-number my 3 models to at least resemble the last 3 of the remaining prototype covered hopper cars in this distinctive paint scheme.  Wish me luck, especially with the undecorated kit version of the model.