Saturday 30 May 2020

Railroad Crossing Road Markings

Before I get to my HO scale railroad crossing road markings, Brian Smith sent along this photo of the very well-weathered covered hopper PLCX 28283 from the Ontario Southland yard at St.Thomas, Ontario last week.  You may have seen this same photo last Sunday over on George Dutka's excellent White River Division blog.
Brian told me later that OSR had brought the car from the C&O over to CN, which then delivered it to the nearby Agrico Canada fertilizer plant.

And he had a photo of the other side of the same car as well...
My friend Luc is looking into finding models of this type of car for Brian, and for me too.  But, shipping cost into Canada is a problem.  A real problem.  Shipping will cost more than the freight car does.

Brian also sent along this detail shot of the reporting marks patchout.  Barely visible in the patchout are the ghost reporting marks of RVPR (Riverport RR).  I think the number looks to have been 2401.
Not to digress too much, but here's a link to an interesting 2017 magazine write-up I found about the Riverport Railroad


And so now, on to the model railroad part of the post for this week...I got a bit more done on that roadway/railroad crossing from last week.

I did make a stencil of the roadway markings image that I'd found on the internet.  Here's that image again.

I taped the stencil onto the road, and then sprayed it lightly with flat white paint.  I also used Railbox Yellow to re-paint the centre line of the road, instead of the white that I'd used the first time.
Since I had the airbrush going, I also taped off a few areas on the road and sprayed them with a couple of different shades of grey to represent patches done by the city road crews.

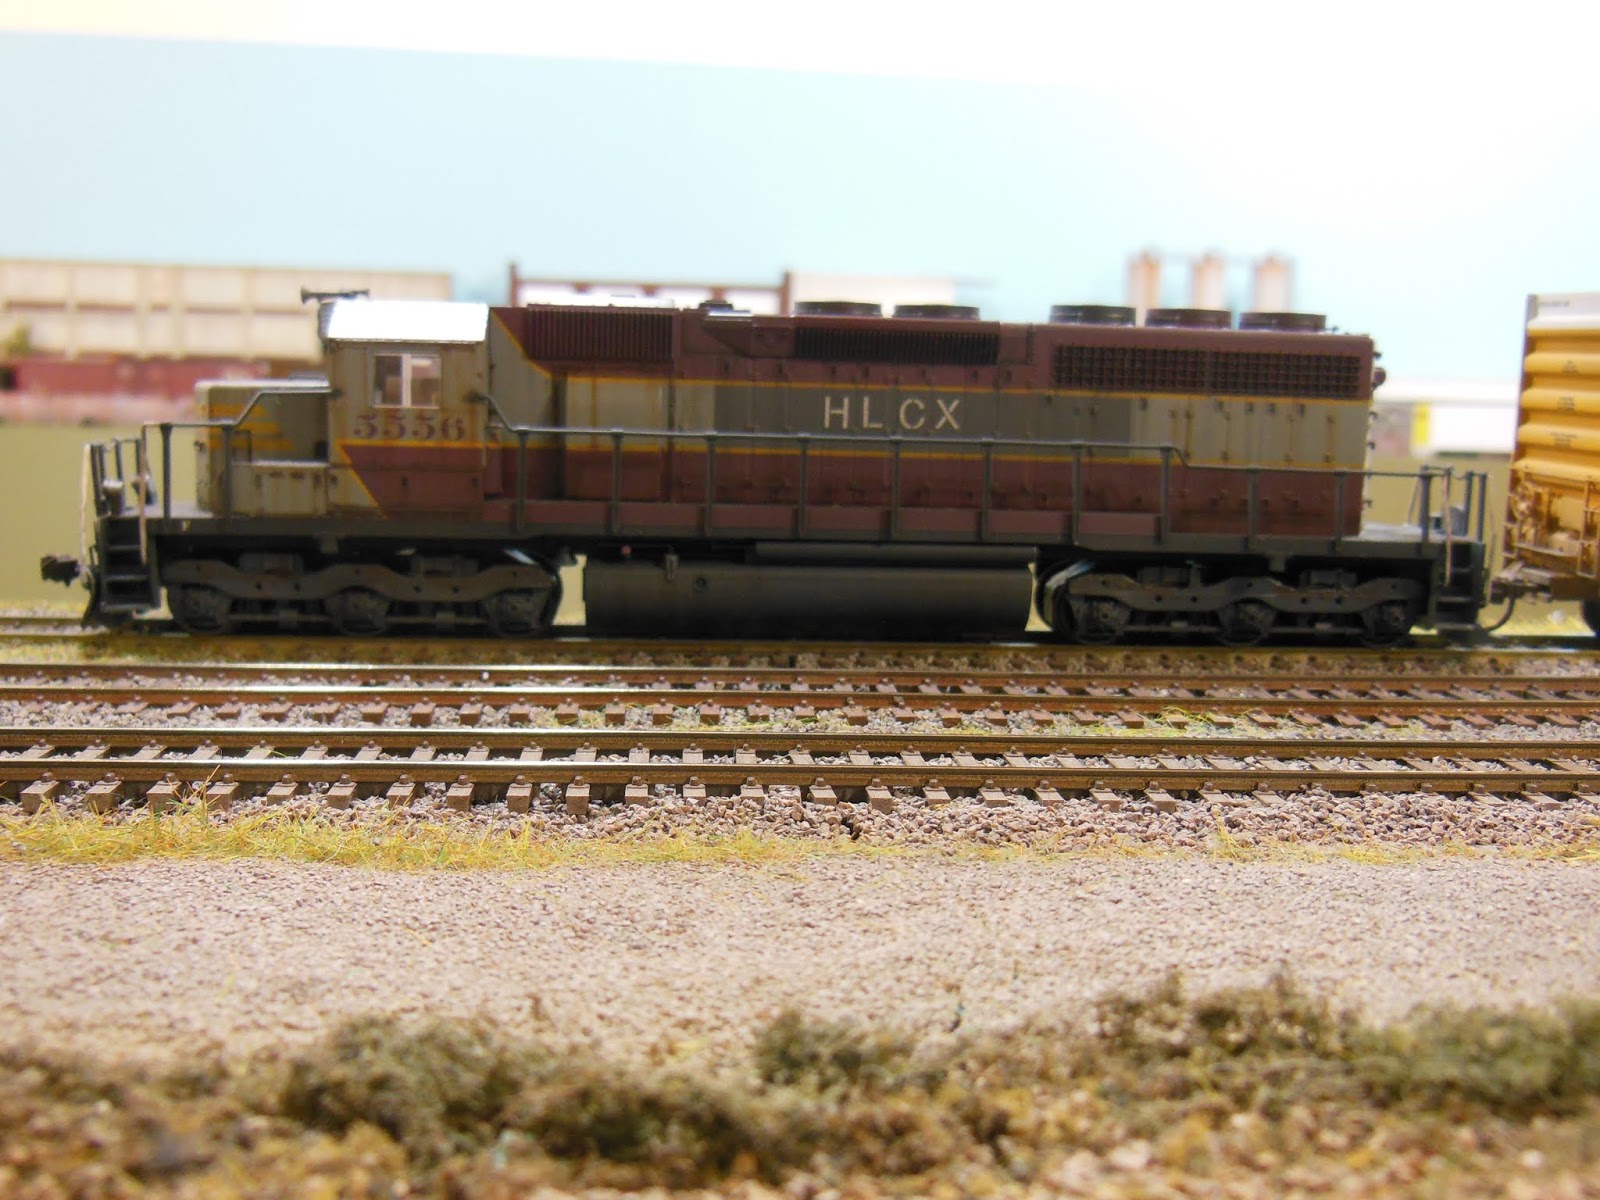
A longer view of the crossing/intersection as SD40 HLCX 5556 crosses. I added a bit of ground cover to better fill in the area between the road and the scrap-yard fence.  

And one more look from above...


Saturday 23 May 2020

Slight Roadway/Crossing Improvement

A few weeks ago, I posted this photo and commented that there really should be a stop sign for road traffic at this crossing/intersection.

Here's a look at what I've come up with following a simple internet search.  I sized and printed this image in Paintshop, and then mounted the print onto a small scrap piece of .010 styrene.  I then cut the 3 individual signs out with an Xacto blade and glued them separately onto a short piece of .025 wire.


With the signs finished up, I masked the outline for the road markings and sprayed the lines using flat white paint. Probably should have used yellow for the centre line.
This is how the road/rail intersection stands now, which is really no great improvement, but maybe a little better than before.  I have to do something about that long crack in the pavement.

And now I've also found this roadway markings image on the internet as well, so I'm going to try to make a stencil of it to add to the pavement as well.

That's as far as I've gotten with this roadway improvement.  Hopefully there'll be more next time.


Saturday 16 May 2020

Using Chipping Fluid

This nicely weathered ATW boxcar appears to have had portions of the sides re-painted where graffiti artists may have been keeping themselves busy.  The boxcar belongs to Jamie Barron.

Those "re-painted" areas were covered with painters tape - it's less sticky than regular masking tape - and then the exposed blue paint was faded by airbrushing.  This time I airbrushed to fade the paint using Proto Paint's Flat Haze, which is actually milky white in colour.  I was tempted to make a couple of more passes with the airbrush, but forced myself to stop as I was afraid of having the white become too noticeable.

A few more passes of the airbrush, this time loaded with Roof Brown, along the lower sill as well as along the roof line add a bit of dirty road grime to the boxcar's sides.

And speaking of the roof, here's a closer look at the roof on this boxcar and how I used MIG Ammo's Chipping Fluid to weather it.

I painted the roof with brown and rust coloured ModelFlex acrylic paints, and then sealed them with Testors DullCote. It seems kind of important to put the rust colours on first, and then the fial roof colour toward the end.  That sequence just looks better in the end.  Anyway, the dullcote is followed with AK Interactive's Chipping Fluid, and once that was dry (10 minutes later), I brushed on Vallejo's Dull Aluminum.  I know that the boxcar roof would not be made of aluminum, but rather galvanized metal.  However, the Dull Aluminum is the only silvery colour of paint that I have on hand.

So that's 4 layers applied in this sequence...
  • Brown and Rust ModelFlex (acrylics) for the rusty colours
  • Testors DullCote (a lacquer) to seal in the first layer
  • MIG Chipping Fluid
  • AK Dull Aluminum (acrylic)
Once the aluminum colour was dry, the fun (and easy) part can begin.  Very lightly dampen the roof panels with just a little bit of water.  This little bit of moisture activates the chipping fluid, allowing the top coat of the aluminum colour to be gently removed using an old artist brush, or some other such item leaving the roof brown and rust colours to show through.  That gives the impression of the rust process having begun on the roof. 

I should note also that it must be an acrylic paint over top of the chipping fluid.

Drone view of the roof panels.


To finish up, I made two quick and light passes with the airbrush loaded with thinned grimy black in order to flatten down the silver (Dull Aluminum) roof.

Saturday 9 May 2020

60 Foot DT&I Boxcar Weathered

I busied myself recently with the weathering of this double-door DT&I 60 foot boxcar for Brian Smith.  I'm happy enough with the results to show the boxcar here.  Note the areas below the door tracks receive less paint fading and grime

This boxcar is an older model made by Atlas, and since the doors can be opened, I thought I should take advantage of that and do a bit of weathering inside as well.  Have a look...

The boxcar shell of this model easily lifts off of the chassis, and once that was done, I quickly brush painted the floor (which was shiny black plastic) first in grey, and then added a silver colour over top of that. With that dry, I smeared AK Interactive's Dark Rust randomly across the floor, and followed that by brushing on a thin black wash that would highlight the gaps between the steel floor "planks".

A few very thin strips of black electrical tape were cut to simulate some scrap banding that's been cast aside, and a scrap of cardboard dunnage as well as a 6 foot long 2x4 have been  left strewn about the floor.

To put the graffiti on the inside of the doors, I removed two of the doors and turned them upside down on my workbench to add a graffiti decal.  After the decal had properly set, I used a stiff bristled brush to paint on a number of rusty scrapes and scratches.

After masking a few areas of the outside walls, which in the end would show as recently painted patches, the green of the exterior walls was faded overall with my go-to Concrete Gray.  Rust streaks and scratch marks followed.

The wheels and trucks were given my usual treatment of camo brown spray paint and rust powders.  I make sure to mask off the wheel treads before spraying with the paint.


Once finished, I kind of think that this 60 footer looks right at home here on my GTW  Maybe I should have tried to keep it for myself...I wonder if Brian would have ever considered letting this one go...


Saturday 2 May 2020

HLCX 5556 (ex CP)

I like leaser engines...and so does my shortline JSSX.  I particularly like 'em when they look like industrial machines that have seen lots of hard service for a long time.  I suppose that the shortline doesn't really care what they look like, just as long as they run reliably.

So with that said...

About 4 years ago, on a visit to Ron Creasor, I saw that he had a very nice Kato model of a Canadian Pacific SD40 on his layout.  The engine was painted in CP's maroon and grey scheme, with the script style lettering, and as soon as I saw it, I thought how it might look if it was weather beaten and patched over as a lease engine.

I noticed the same engine for sale at the train show in Woodstock some time later, but didn't buy it. And then I saw it still for sale at Woodstock again a couple of times after that.  I finally bought it this past January and brought it home.  Glad I got it then, because the April show was cancelled and I don't know when the next one might be held.

A week after I bought it, I had a visit from Mark Yurek, and Mark took the engine home with him to install led lights as well as front end ditch lights for me.  He also did a real nice job setting up the engine to run at low speeds for me. After Mark returned it to me, I got busy with the weathering and patching.

Sadly, this is the only "before" photo that I took,...

I'll just jump from that straight to the photos of the completed weathering/patching.  I chose to place this engine under ownership of Helm Leasing, although I have no reason to believe that they actually may have had an SD40 in this paint scheme.

I removed the Canadian Pacific script lettering using MicroSol and cotton swabs.  The large grey patch was done by masking the area off and then spraying it with SP Lark Dark Gray.  The stenciled style HLCX lettering is Microscale decals.

Lots of overall grime, and some rusty streaking as well.  I might have gone a bit too little heavy with the grime. If I ever get to go to an open hobby shop, I'll want to pick up a set of MU hoses and cab sun shades for this locomotive.


A view below showing the ditchlights that Mark installed for me.